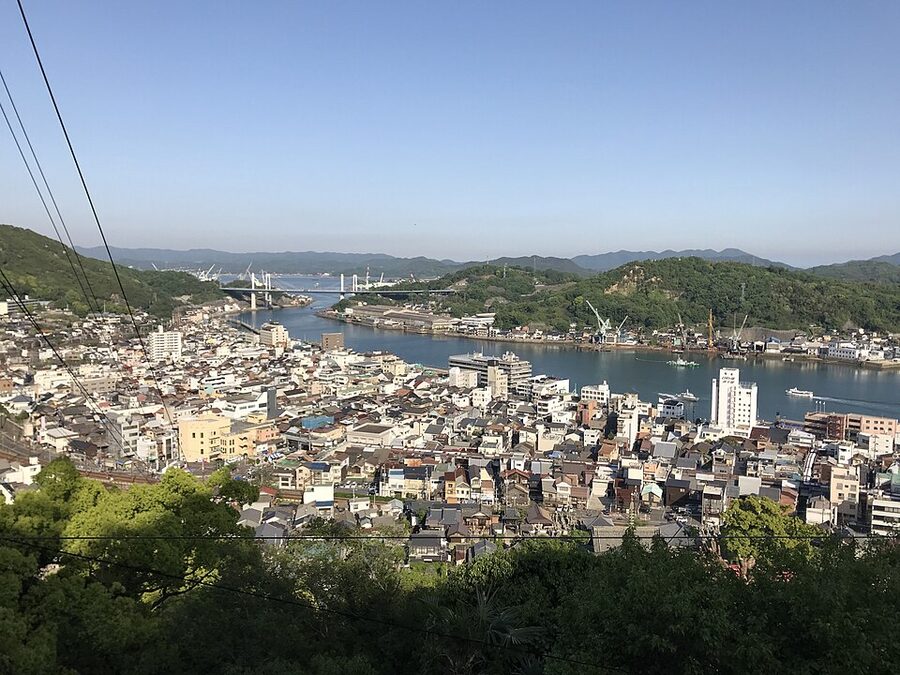
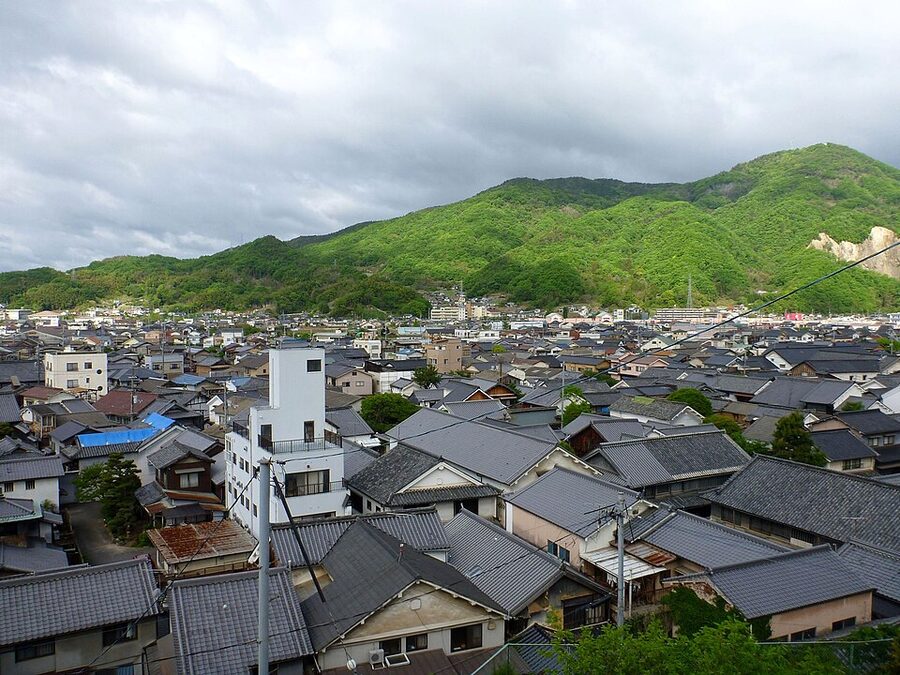
Forty kilometres in, the road bends inland near Aki-Tsu and the noise drops off all at once. The articulated lorries that have been thumping past your left elbow on Route 185 since Mihara are gone for a stretch, the oyster rafts straighten out into a line of black floats on a white-grey sea, and somewhere across the channel the bridges of the Tobishima Kaido start cutting their silhouettes into the haze. The rasp of your tyres on warm tarmac is the loudest thing left. That’s the moment the Sazanami Kaido finally makes sense.

The Sazanami Kaido is the third leg of what Hiroshima’s tourism people call the Setouchi Triangle, the trio of designated cycling roads that pin the eastern half of the prefecture together. The other two are famous. Shimanami sells out hire bikes in season. Tobishima shows up on every “next after Shimanami” list. Sazanami is the one cyclists ride after they’ve done both, or the one they discover by accident when they look at a map and wonder why the obvious blue line between them gets so little airtime.
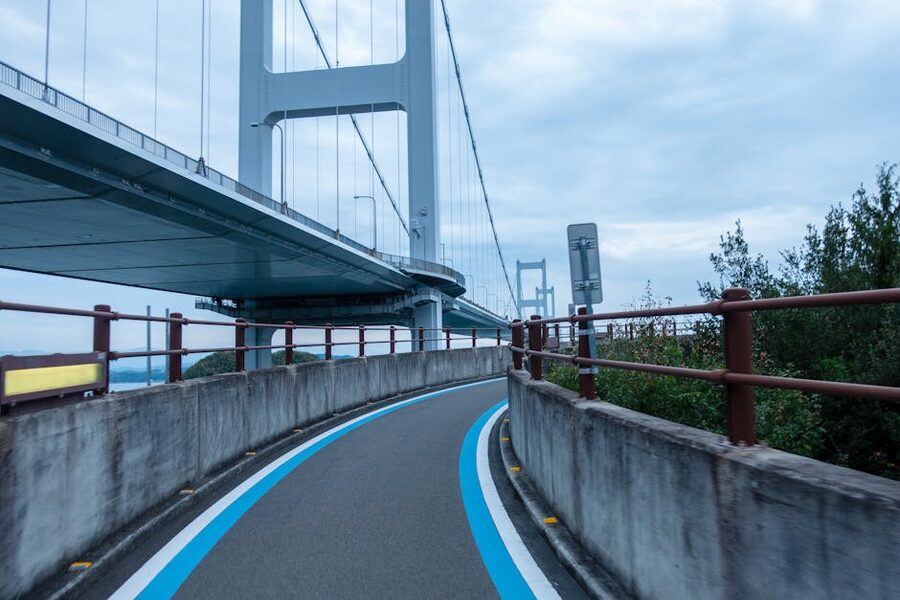
It is, on paper, the easy one. No bridge tolls. No ferry timetables to live by. JR stations every few kilometres along the entire route. About 82km from start to finish, all of it on signposted highway with a 20cm-wide blue stripe painted along the carriageway edge and distance markers every 5km. The Hiroshima Prefecture road division finished off the surface upgrade and the blue-line markings in 2013 with the same anti-skid asphalt they used on Shimanami, which means it grips even after a wet morning. You could ride it on a folding bike with five gears.
And yet you almost never see foreign cyclists on it. There’s a reason for that, and the reason gives the route its character. Sazanami is a real working road. The blue line is painted on the shoulder of National Route 185 for most of its length, with a short stint on Route 2 at the Onomichi end. There is traffic. There are tunnels. About half the supposed “sea road” runs inland, hugging the railway line through wooded hills and small bypasses while the actual coast sits a few hundred metres to your left. The half that does sit on the water is genuinely beautiful, and the half that doesn’t is a little dull.
If that trade-off doesn’t put you off, this might be the most interesting Setouchi ride you’ll do. Here’s how to get the most out of it.
In This Article
- Sazanami at a glance vs the rest of the Setouchi Triangle
- The route, in plain numbers
- Where to start: Onomichi, Mihara or Kure?
- Onomichi to Mihara: getting going
- The Mihara–Takehara stretch: the part you came for
- Takehara: the right place to break
- Takehara to Aki-Tsu and the Akinada junction
- The run into Kure
- Bikes: rent it where?
- Trains and bailout points
- Where to stay if you split it across two days
- What to ride after, or pair with
- The verdict
Sazanami at a glance vs the rest of the Setouchi Triangle
The three routes are often grouped together but they ride very differently. If you’ve already done one or two, this is roughly how Sazanami compares.
| Route | Distance | Bridges / islands | Traffic | Best for |
|---|---|---|---|---|
| Shimanami Kaido | ~70km main line | 6 islands, 7 bridges, dedicated bike lanes | Light on islands, busy at Onomichi terminus | First-time Setouchi riders; classic Japan-by-bike piece |
| Tobishima Kaido | ~30km out, longer with extensions | 7 islands, 7 bridges, mostly quiet roads | Very light once past Akinada Ohashi | Slow-tempo riders; old port towns; quietest of the three |
| Sazanami Kaido | ~82km point to point | None, mainland coast and inland bypasses | Moderate to heavy on Route 185 stretches | Connecting Shimanami and Tobishima as one big loop; train-paced touring |
The point of Sazanami isn’t to compete with the other two. It’s to glue them together. Onomichi is where Shimanami starts. Kure is where you finish if you’ve come down through Tobishima from Imabari and followed the Akinada bridges back to the mainland. Joining them up turns three good rides into one continuous Setouchi loop somewhere north of 200km, and it’s the only way to do that without putting a bike on a train.
The route, in plain numbers
The official Sazanami Kaido recommended route runs from JR Onomichi Station in the east to JR Kure Station in the west, ~82km along National Route 2 and National Route 185. It crosses five city boundaries: Onomichi, Mihara, Takehara, Higashi-Hiroshima (a short Aki-Tsu stretch) and Kure. The blue line is the longest in the Setouchi 7 Kaido network — a fact most riders don’t know.
You’ll meet three properly noticeable climbs, all in the eastern half. The first is between Onomichi and Mihara where the road heaves up over a low headland to avoid Itozaki. The second is the short pull out of Suba toward Tadanoumi. The third is the cluster of small ridges between Aki-Tsu and the Akinada bridge feeder, which together come at you in sequence rather than as one big effort. The Onomichi-to-Kure direction is, on balance, the better one to ride. The first half is hilly, the back half is flat, and you finish coasting into Kure with the prevailing afternoon wind on your back.
Total elevation gain is modest, somewhere in the 600–700m range across the whole route, but it sneaks up on you because the climbs are short, sharp and unannounced. There’s no Pacific-coast reverse climb out of nowhere here. Just stub headlands.
One administrative note worth knowing: the prefecture’s own page on the route puts the official starting and ending points as JR Kure Station and JR Onomichi Station respectively, not the city centres or any of the smaller stations on the way. The blue line literally starts at the station forecourts. If you find yourself somewhere with no blue line, you’ve drifted off Route 185.
Where to start: Onomichi, Mihara or Kure?
You have three sensible starting points. They all work. They all have JR access. The choice is about what you want from the day.
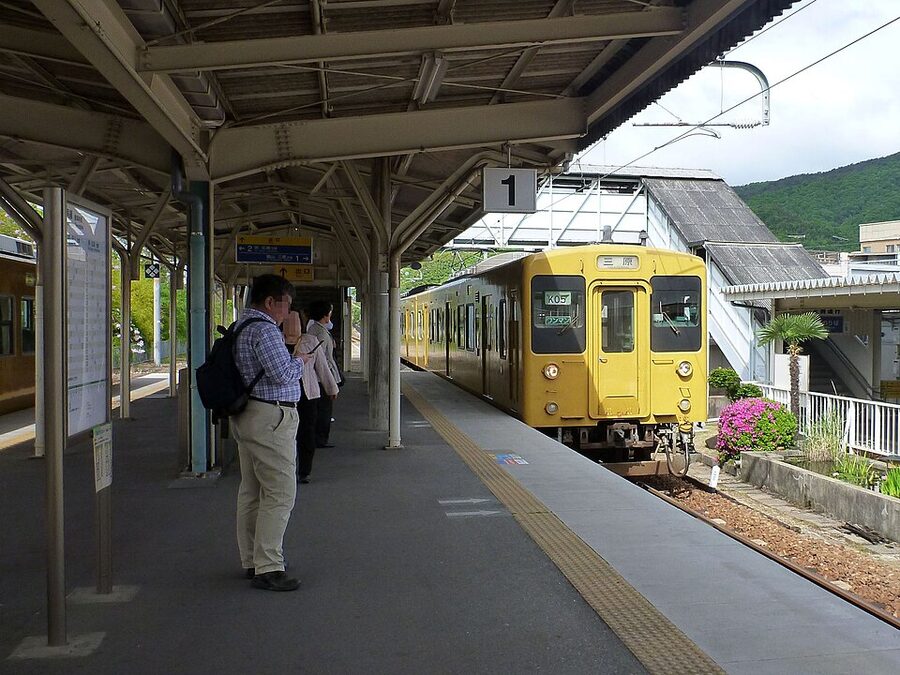
Onomichi (the official east end). Start here if you want the full 82km, want to combine it with a Shimanami day either side, or just like the satisfaction of riding from a bookended station to a bookended station. The downside is you eat the three climbs early when your legs are fresh but the mid-morning sun is in your face. Onomichi Station is on the JR Sanyo Main Line, ~90 minutes from Hiroshima or ~70 minutes from Okayama, both with regular services.
Mihara (the practical middle). If 82km is too far for one day or you’ve come specifically for the section everyone agrees is the prettiest, start at JR Mihara Station. It’s on the Sanyo Shinkansen with Kodama and Hikari trains stopping there, which makes it the easiest station on the route to reach by rinko (boxed bike) from Tokyo or Osaka. From Mihara you ride 26km to Takehara through the best stretch of coastline on the entire route, and you can either turn around or push on the remaining ~40km to Kure. Local cyclists make the case bluntly: the Mihara-to-Takehara segment is, in her words, the best stretch of Seto Inland Sea she’s ever seen, and she’s lived in Hiroshima for decades. She’s not wrong.
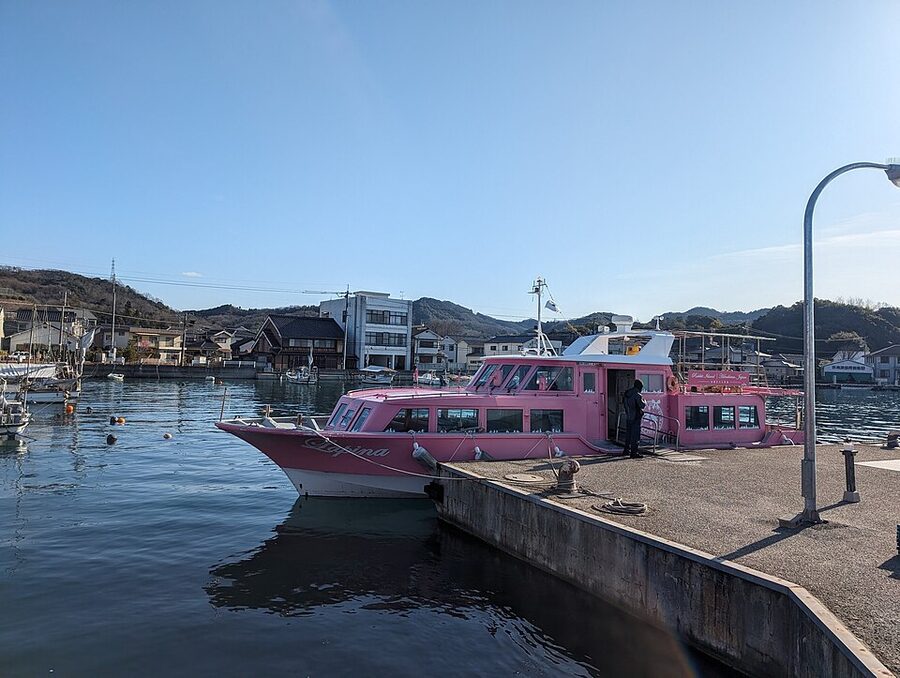
Kure (start at the west end). Pick this if you’ve done Tobishima and want to ride east back to Shimanami, or if you want to finish in Onomichi for a hotel that’s already booked. Kure is also the better choice for the Yamato Museum and the Sea of Japan Maritime Self-Defense Force submarine viewing if those are why you came at all. JR Kure Station is the western terminus of the Kure Line and connects to Hiroshima Station in about 50 minutes by direct rapid service.
Onomichi to Mihara: getting going
The first 25km out of Onomichi is the part the route’s critics get noisy about. National Route 2 from Onomichi to Itozaki is a four-lane trunk road with a generous shoulder but a constant flow of trucks, and the headland climb after Itozaki involves a couple of short tunnels. None of it is unsafe, the shoulder is wide, the blue line is clear, and the tunnels are well-lit, but if you came for serene island views you’re going to spend an hour wondering what you’ve signed up for.
This is where the inland-versus-coastal split shows up earliest. There’s a parallel quieter route via Kifune Shrine and the Itozaki backstreets that drops two of the three trunk-road kilometres, but it costs you about 1km of distance and a few short ramps. Local cyclists tend to take it. There’s no signage; you peel off onto the prefectural road south of the shrine and rejoin Route 2 at Itozaki Port.
By the time you reach Mihara the road has settled. Mihara is also the cleanest place on the route to bail out if the conditions are wrong, back on the Shinkansen and home in time for dinner.
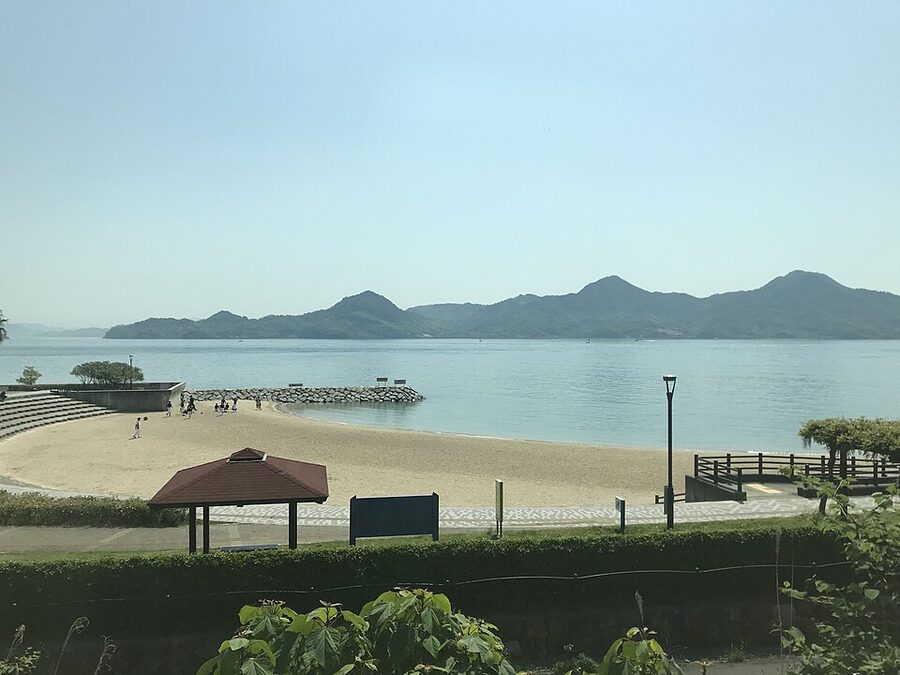
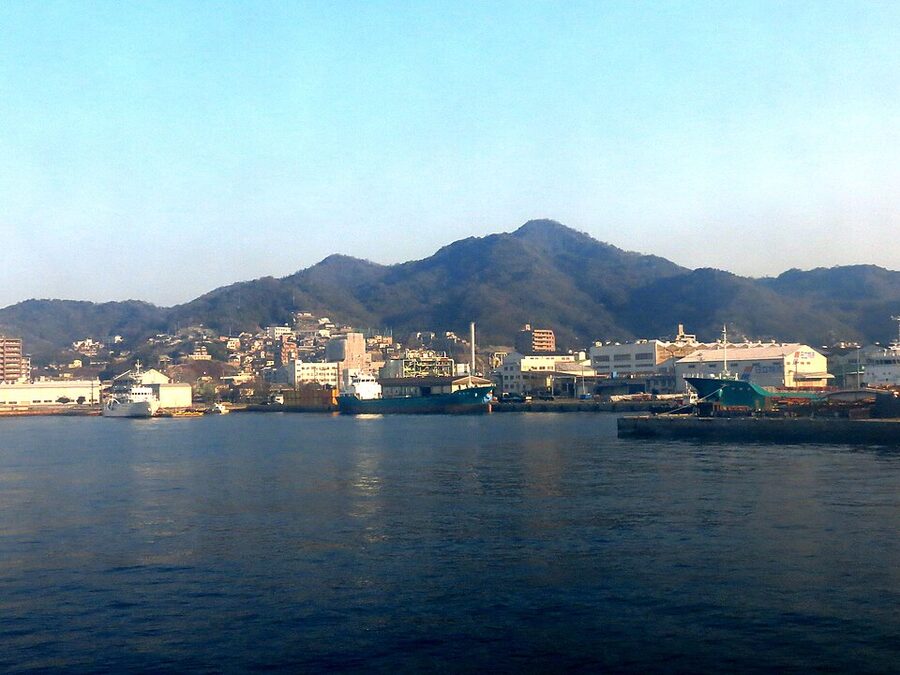
South of Mihara town the road meets the water properly for the first time, at Suba Port. Suba is a useful break point: the small Sunami Seaside Park sits about a kilometre on, and there are vending machines and a public toilet near the ferry terminal where boats run several times a day to Ikuchijima on the Shimanami Kaido (handy detour if you decide mid-ride to bail out and ride back to Onomichi via Shimanami). Mihara is famous for its octopus. Suba Port has takoyaki stalls run by people who take that fame seriously. Eat one. Don’t eat three; you’ve got 60km left.
The Mihara–Takehara stretch: the part you came for

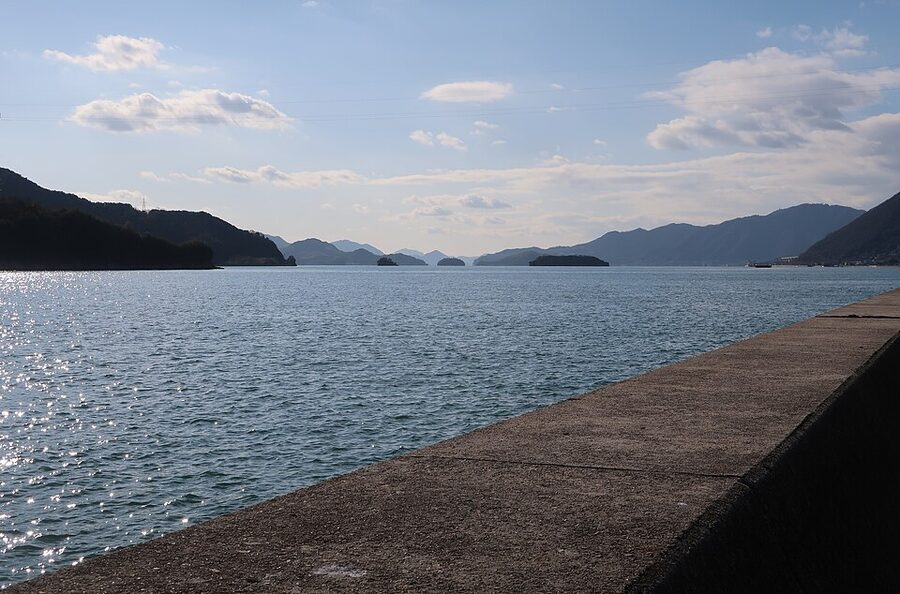
Roughly 26km of road from Mihara through to Takehara. This is the section that, for the cyclists who actually rate Sazanami, justifies the whole route. The road sits on the water for almost the entire stretch. The blue line runs along the seaward edge of the carriageway, which is normally the wrong side, you ride against the traffic if you stay on it, so you pull onto the inland-side shoulder for safety and treat the seaside line as a marker. The hills inland are wooded, low, and pleasingly bumpy. The islands across the channel get steadily larger as you ride west.
The single best stop in this section is Tadanoumi.
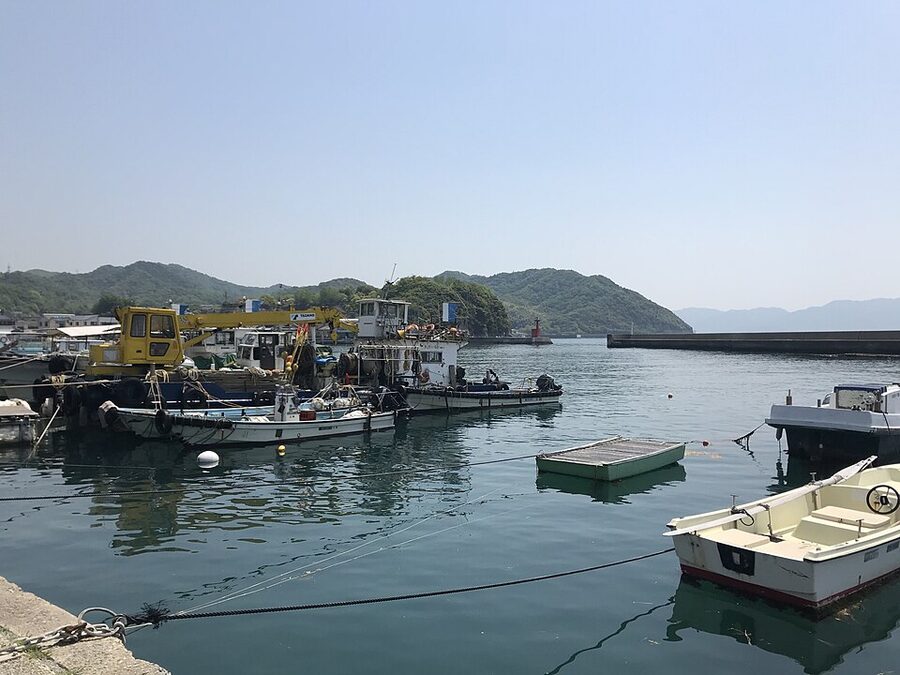
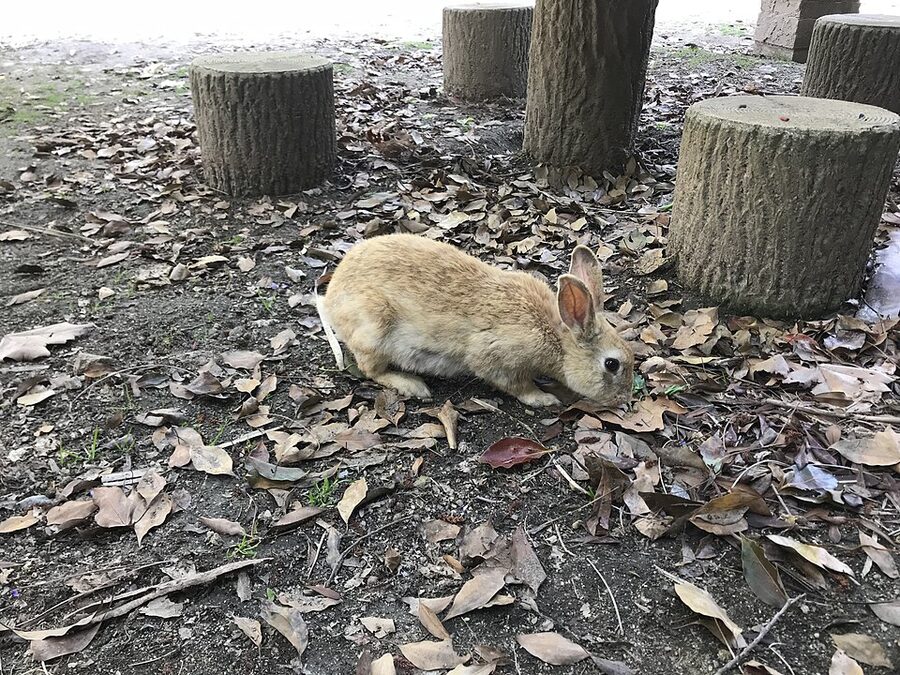
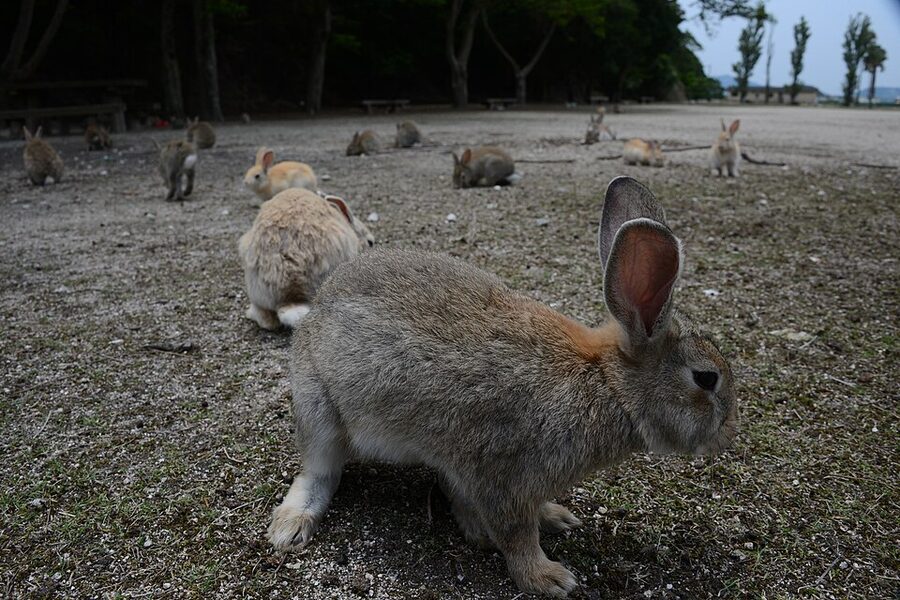
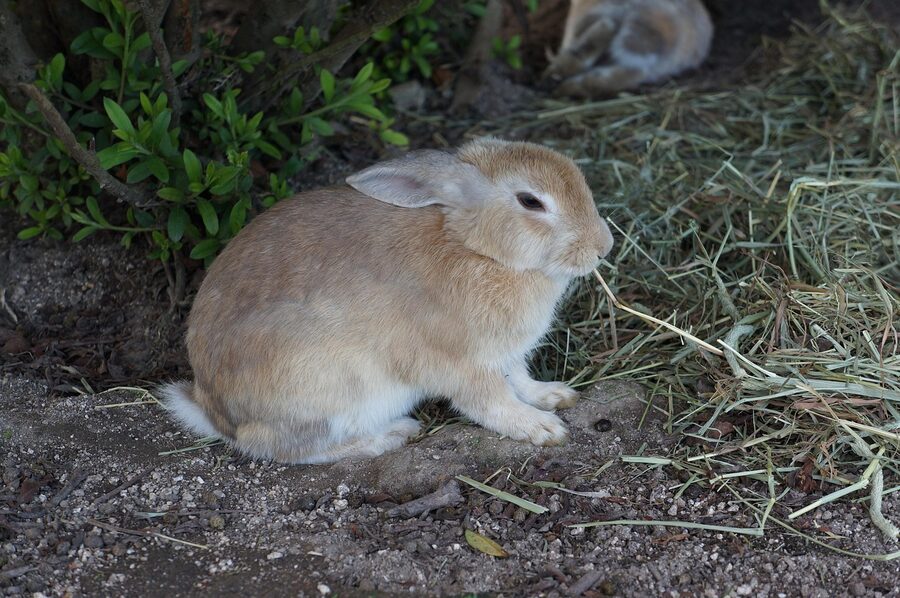
Tadanoumi Port (忠海港) sits about halfway between Mihara and Takehara. It’s a small, scruffy fishing harbour with a ferry terminal stapled onto one side, and the ferry is the reason it gets busy. From Tadanoumi you can put your bike on a 15-minute boat to Okunoshima, the so-called Rabbit Island.
Okunoshima is a strange place. It’s a former poison-gas factory island from the 1930s, decommissioned, and over the decades a feral rabbit population has taken over. There are now several hundred wild rabbits roaming a 4km perimeter, none of which are afraid of humans and most of which will mob you if you sit down with food. The trail-cycling.com author who rides Sazanami warns about queue lengths on the Tadanoumi ferry on busy weekends, and from personal observation she’s right: I once watched a Saturday queue of about 60 people stretch from the ferry terminal to the highway. If you’re on a tight schedule and the queue is past the gate, write it off and keep going.
Locking the bike at Tadanoumi and hopping the ferry costs you 90 minutes minimum, more if you actually walk the island. It is genuinely one of the more peculiar travel experiences in Japan and most riders agree it’s worth the time. Just don’t try to wedge it into a same-day Onomichi-to-Kure ride. Stay overnight in Mihara or Takehara if you want both.
Takehara: the right place to break
Takehara is sometimes called the Little Kyoto of Aki because of its preserved Edo-period merchant streets. The full preservation district covers about 10 city blocks of black-tiled, white-walled houses that once belonged to salt-merchant and sake-brewing families, and a handful are now museums and tea rooms. It’s compact enough to walk in 45 minutes and worth the leg-stretch.
The food in Takehara is where you eat properly on this ride. The local thing is gyohan, a fish-rice dish locally called “phantom regional cuisine” because it’s hard to find outside the town. It’s basically simmered local fish flaked over rice with a clear broth poured over the top, and a couple of restaurants in the preservation district serve it as a set with seasonal sides. Two-and-a-half thousand yen will get you a generous lunch you can ride on. There’s also a sake brewery, Taketsuru, that runs short tours; I’d skip the tour if you’re solo and pressed for time and just buy a small bottle to pack.
Hotel-wise, if you’re splitting the route across two days, Takehara is the obvious overnight. Business hotels around the station start at around ¥7,000 a night and bike-storage is generally fine if you ask. Avoid sleeping in Aki-Tsu, there’s almost nothing there.
Takehara to Aki-Tsu and the Akinada junction
West of Takehara the road tightens up. The hills inland press closer to the coast, the highway threads between them and the sea on a thin shelf, and the rhythm of the ride becomes an alternation between sharp uphill ramps when the headlands push the road inland and short coastal cruising sections when it falls back to the water. It’s the only stretch of Sazanami where the riding is properly varied: nothing on either side of it makes you change gear this often.
Aki-Tsu, the only Higashi-Hiroshima town on the route, has a brief moment of fame for its red-soil potatoes, which appear in late spring as a roadside item at the small farm stands. They’re better than they sound, sweet, dense, properly seasonal. None of the stands speak English, but pointing at the pile and holding up two fingers gets you about ¥400 worth of potatoes you’ll have nowhere to put. (Take them anyway. Eat them with butter at your hotel later.)
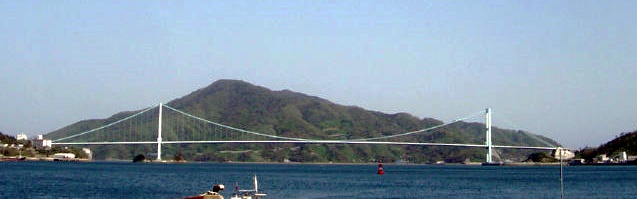
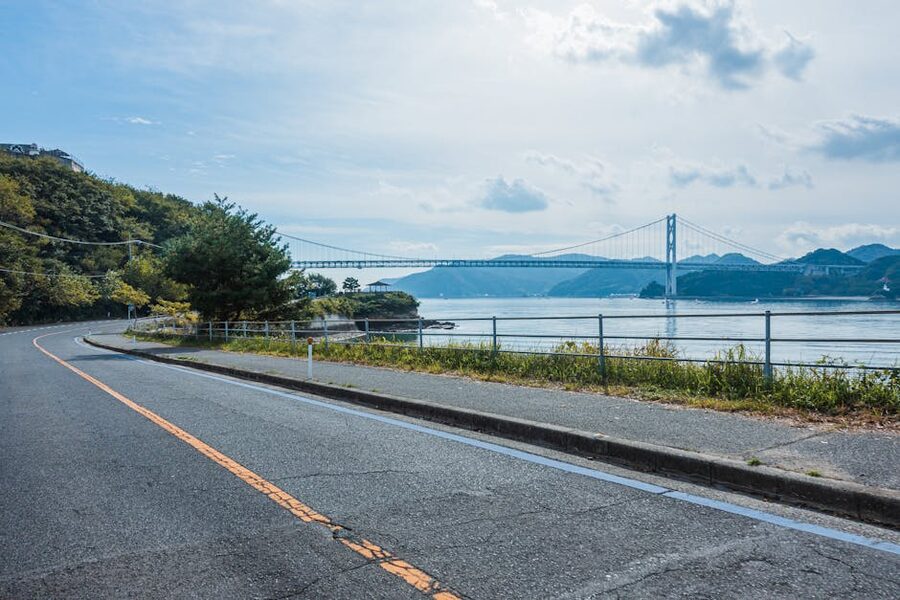
Around 60km in, the road meets the foot of Akinada Ohashi, the long suspension bridge that drops south onto Shimo-Kamagari Island and starts the Tobishima Kaido. If you’re doing the Setouchi loop, this is your turn. If you’re sticking to Sazanami, you stay on Route 185 and continue west toward Kure. There’s a sazanami cycle port (one of the 15 along the route) here with a public toilet and a bike pump, useful for everyone regardless of which way they go.
The run into Kure
From the Akinada junction the road tightens into the back end of Kure city and the character changes one more time. You ride through Hiro, a low-rise port suburb dominated by a former Mitsubishi shipyard and now a Showa-era residential grid, and into a short tunnel called the Niigata Tunnel that drops you on Kure’s outskirts. After the Yasumiyama tunnel the road widens, the carriageway reorganises into urban lanes, and the Sazanami Kaido finishes at JR Kure Station with no fanfare at all. There’s no sign at the end. The blue line just stops.
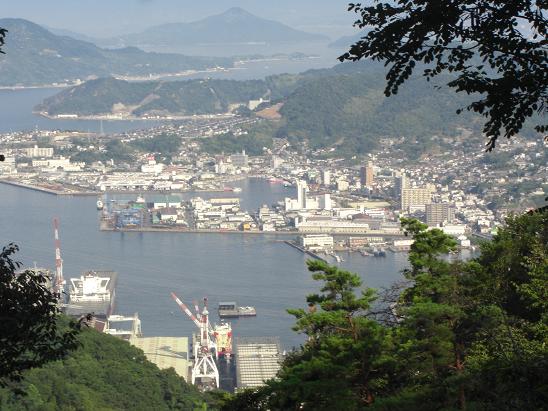
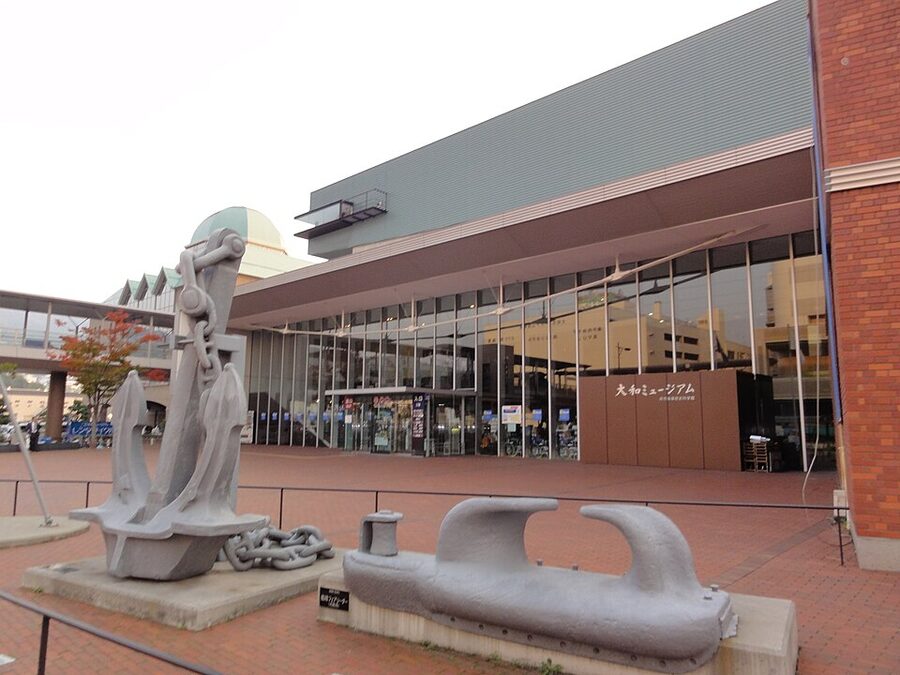
Kure rewards a finish-line stop. The town is best known to most foreign visitors as the home port of the battleship Yamato, the largest ever built, and the Yamato Museum near the station has a 1:10 scale model that’s worth an hour even if you have zero interest in naval history. The neighbouring JMSDF Kure Museum lets you walk through a real decommissioned diesel-electric submarine, which is a less common experience.
Food in Kure is two specific things. The first is kaiji curry (海自カレー, navy curry), which is what the Maritime Self-Defense Force serves on board its ships every Friday and which now appears as a printed menu item in about two dozen restaurants across the city, each tied to a specific ship’s recipe. The second is Kure-style hosouudon, a noodle thinner than standard udon but thicker than soumen, served with a punchy soy and bonito broth. Both are easy to find within ten minutes of the station, and both will set you back about ¥1,000.
Bikes: rent it where?
Sazanami has no dedicated rental network. None of the official bike-share schemes that cover Shimanami or Tobishima extend to Sazanami; you can’t pick up a hire bike in Onomichi and drop it off in Kure, and you can’t pick one up in Kure and drop it off in Onomichi. The Hiroshima Prefecture page on the route is direct about this: there are no rental cycles specifically for Sazanami.
The practical workarounds are three:
Use the Shimanami public rental and ride a return loop from Onomichi. Sagawa’s “Tebura Cycling” service in Onomichi will rent you a road bike and let you do a same-day return run. Out and back from Onomichi to about Tadanoumi (~80km, mostly flat in the western direction, three climbs reversed in the east-bound direction) is the practical limit. Anything past Tadanoumi forces a return loop too long for a sensible day.
Bring your own bike. The whole route works on a road bike with 28mm tyres or a flat-bar tourer with anything >32mm. There is no off-road element. The blue line surface is good. Pack rinko if you’re coming from outside Hiroshima, both Mihara and Kure are easy stations to land at.
Use a bike-shop concierge in Kure or Mihara. A handful of shops will rent road bikes by the day, but they all want a phone reservation and a Japanese-language email exchange, so it’s hard to recommend without the right contacts. The Setouchi DMO has a list. Walk-ins are unreliable.
Trains and bailout points
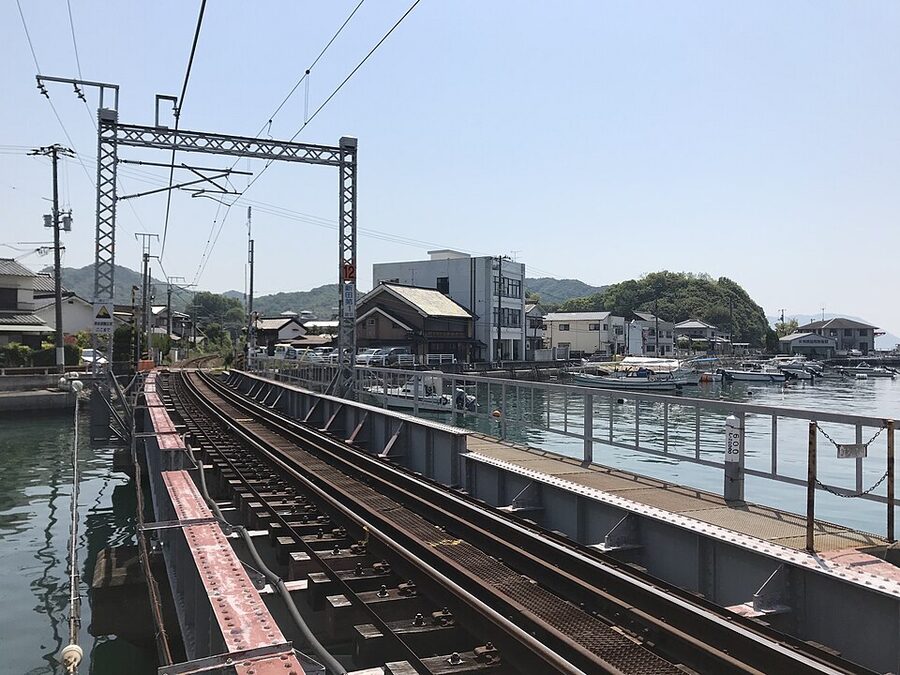
This is the route’s quiet superpower. The JR Sanyo Line runs east-west across the eastern third (Onomichi to Mihara), the Kure Line takes over for the rest of the route, and there is a station every few kilometres for almost the entire 82km. If the wind turns, your knee gives, the rain hits or you simply get bored, you can pack the bike into a rinko bag and be on a train in fifteen minutes.
The notable stations, west to east: Kure, Aki-Saizaki, Aki-Akasaki, Aki-Tsu, Tadanoumi, Takehara, Aki-Hiro, Mihara, Itozaki, Onomichi. Kure Line trains are basic two-car commuter sets that arrive every 30–60 minutes, more often at the Mihara/Kure ends. There is no luggage-free rinko on these services; you must bag the bike. The site’s general cycling-Japan FAQ covers rinko mechanics in detail.
Where to stay if you split it across two days
Two-day Sazanami is a more relaxing ride than the one-day version. The middle of the route is also the prettiest, so any overnight that puts you in Mihara, Tadanoumi or Takehara works.
Mihara. Best for arrival convenience because of the Shinkansen station. A handful of business hotels cluster around the station; rooms from about ¥7,500. Mihara doesn’t have huge atmosphere and most travellers move on quickly, so factor that in.
Takehara. Best for atmosphere. The preservation district has a couple of small inns and a guesthouse converted from a sake-merchant’s home; rooms from about ¥9,000. Bike storage is reliably good in family-run places, ask before booking.
Onomichi or Kure (start/end). If you want a longer-stay base, Onomichi has the broader hotel selection (and works as a Shimanami day-trip base too). Kure has fewer hotels but cheaper rates around the station.
What to ride after, or pair with
Sazanami’s job is to connect things. If you have one day, ride it standalone, but most cyclists who come for the route end up combining it with a second.
The classic pairing is Shimanami Kaido day one, Sazanami day two, finishing in Kure. Two days, ~150km, basically flat once you’re past the Onomichi headland, and you’ve ridden two-thirds of the Setouchi Triangle. Add Tobishima for a third day if you’ve got it, the Akinada bridge route from the Sazanami midpoint south to the Tobishima Kaido is the loop that pulls all three together.
Different in spirit but worth a look on a separate trip: the Lake Biwa loop if you want a longer single-day cycling roads route in central Japan, the Tokaido if you want to ride a historic highway end to end, or the Awaji Island loop for another comparable mainland-coast ride. None of those are on the Sazanami radar but cyclists who ride one Setouchi route tend to end up doing the lot.
Brief-three siblings, the underrated designated routes scattered across the rest of Japan, are also worth knowing about. The Tsukuba-Kasumigaura Ring Ring loop is the closest analogue to Sazanami in feel: a national designated route, mostly flat, hugely under-ridden by foreigners. Kibi-no-michi near Okayama is shorter but on the same lineage of “old Japan, official cycling road, very few foreign cyclists.” Keinawa runs Kyoto–Wakayama and is the inland-mountain counterpart. Pair any of them with a Setouchi week.
The verdict

Sazanami is not Shimanami. It’s not even Tobishima. There is no signature bridge crossing, no island-hopping rhythm, no postcard moment that travel magazines have already taught the reader to look for. There are stretches that are downright unremarkable, particularly in the first 25km and the last 15km. There is real traffic. The blue line ends at a station forecourt, not a viewpoint. And if you came hoping for a quiet seaside stroll on a bike, those first hours on Route 2 will throw you.
But the section in the middle, from Suba through Tadanoumi and Takehara to the Akinada turnoff, is, hand on heart, one of the prettiest pieces of mainland-coast cycling I’ve found anywhere in the country. Hiroshima cyclists call it the best Inland Sea view she’d ever seen wasn’t exaggerating. And the route’s uselessness as a destination piece is also the thing that makes it useful: it’s the only way to ride from Shimanami to Tobishima on the mainland, the only way to do all three Setouchi routes in continuous order, and the only way to leave Onomichi by bike and arrive in Kure for navy curry by sunset.
If you’ve already done Shimanami, ride Sazanami. If you’ve already done Shimanami and Tobishima, the loop you’re missing is the one that links them. The blue line is right there.