Shiga Prefecture’s tourism board plans Biwaichi at an average speed of 12 km/h, breaks included. That’s not a typo. The official daily-distance recommendations on biwako1.jp assume you’ll cover roughly 75 to 96 kilometres in a touring day, and they get there by budgeting eight hours in the saddle for a 96-kilometre stage. Twelve kilometres an hour is the speed of someone who stops for coffee. It is also the speed at which the 200-kilometre loop becomes a sane two-day project rather than a heroic one, and that single number changed how I planned my own lap of Japan’s largest lake.
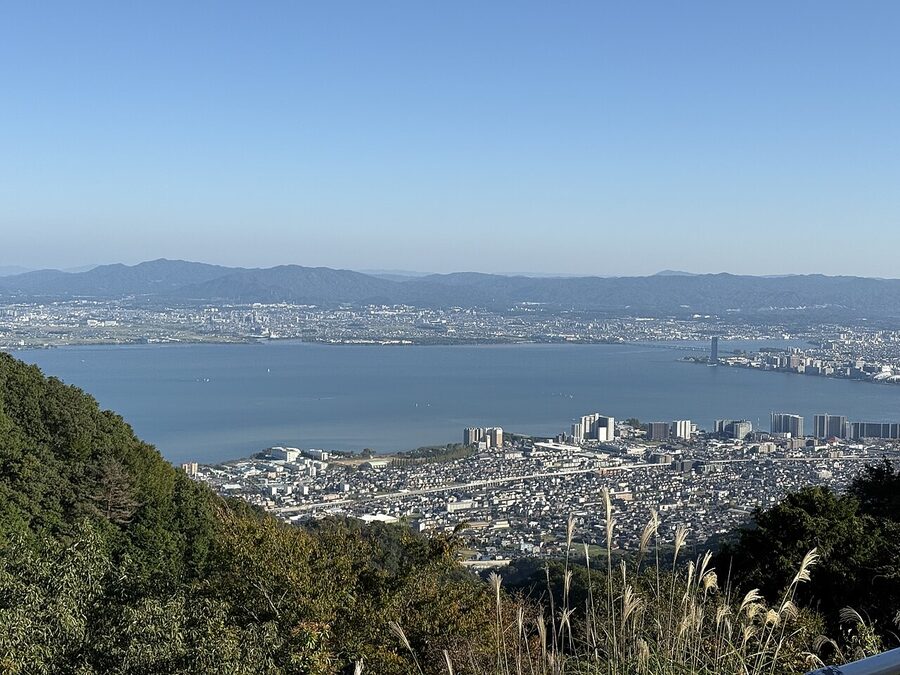
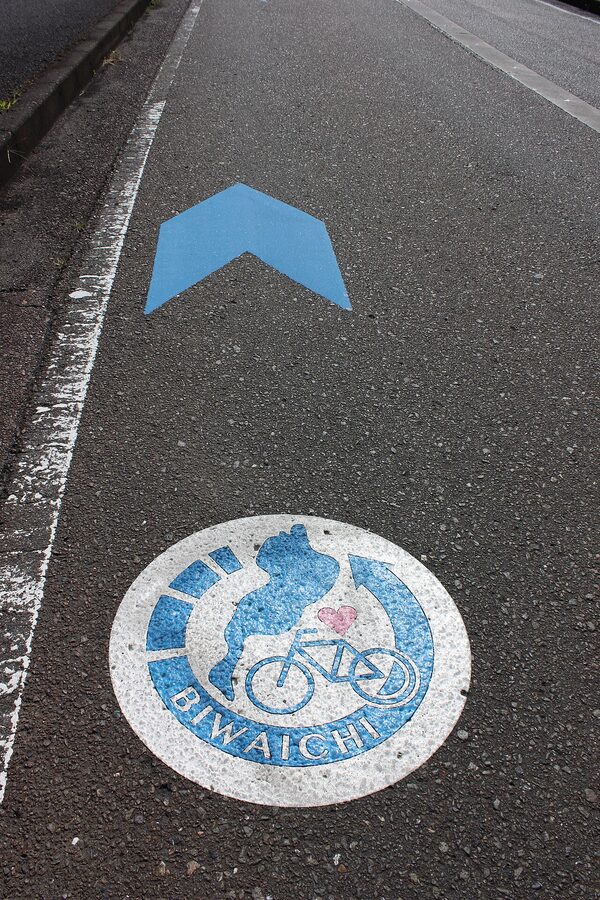
Biwaichi (ビワイチ) is one of Japan’s six designated National Cycle Routes and the only one that loops a lake. The full circuit is about 200km if you ride both halves of the lake. Skip the southern Nanko by crossing the Biwako Bridge from Katata and you’re down to roughly 146km. Ride only the northern Hokko ring out of Maibara and you’re at about 150km. Whichever version you pick, you’ll see the same blue road arrows, follow the same counterclockwise grain of traffic, and eat at the same roadside stations along the way.
In This Article
- Biwaichi at a glance: the three loops worth riding
- How long does it actually take?
- Which way to ride: counterclockwise, always
- The east shore: flat, fast, and the best part
- Maibara, Hikone, and the bike rental that everyone uses
- Nagahama and the Kohoku stretch
- The two passes: Mt Shizugatake and Tsukide
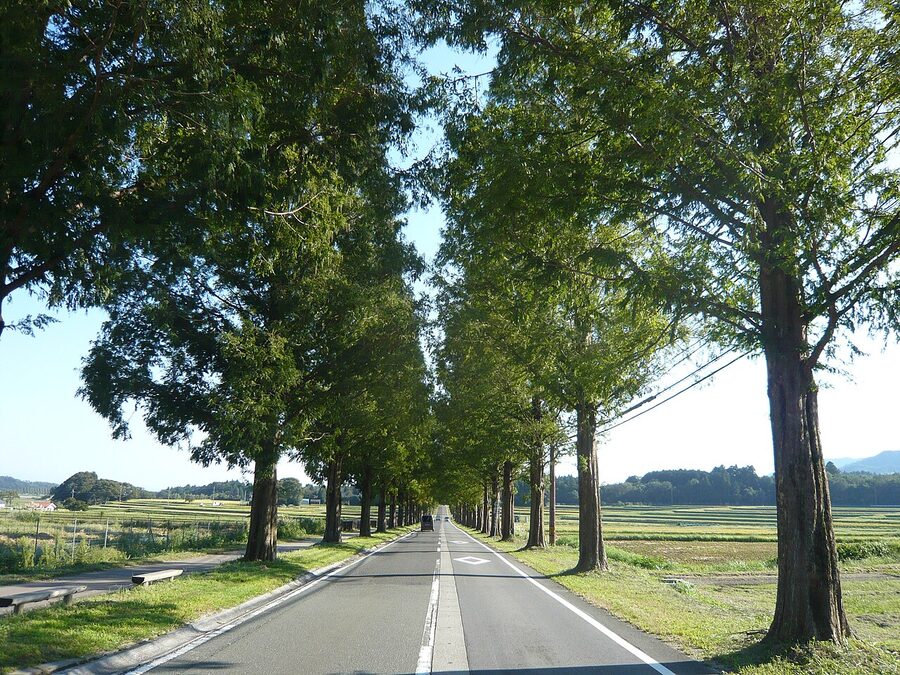
- Makino and the Metasequoia Avenue
- The west shore: Shirahige Shrine and the busy bit
- The southern lake: temples on water and the bridge across
- Ukimido: the temple on the water
- Otsu Port and Seta-no-Karahashi
- Best season: when to ride and when to skip
- Where to stay: the four best Biwaichi base towns
- Bike rental and getting your bike to the lake
- Food on the route: where to actually eat
- Practical kit and small details
- How Biwaichi compares to Shimanami
Biwaichi at a glance: the three loops worth riding
Three loops, three difficulty levels, three different trips. The choice mostly comes down to how many days you want to give it.
| Loop | Distance | Days | Climbs | Best for |
|---|---|---|---|---|
| Full Biwaichi (Nanko + Hokko) | ~200km | 2–3 | 2 short passes, 7–8% grade | Anyone who wants the certified completion |
| Hokko-only (north loop) | ~150km | 2 | Same 2 passes | Best scenery-to-effort ratio |
| Nanko-only (“Pucchi Biwaichi”) | ~50km | 1 | Flat, one bridge climb | First-time tourers, half-day rides |
The 50km Nanko loop is what Japanese cycling magazines call pucchi biwaichi: mini Biwaichi. Don’t ignore it. If you’re testing a rental, recovering from a long flight, or only have a Sunday, the southern lake gives you the temple-on-water at Ukimido, the historic Seta-no-Karahashi bridge, and the Otsu Port mural in one easy day.
The Hokko-only loop is the version most people actually finish. You start at Maibara, ride the quiet east shore north, climb the two short passes near Shiotsu, and come back down the busier west shore. Two days, one overnight, one sense of achievement.
The full loop is the trophy. The southern half adds the cultural and historical density (Otsu, Seta, the floating temple) but it also adds the worst stretch of road on the whole route: Katata to Otsu Port, where there’s no dedicated bike path and the traffic is heavy. Plenty of riders skip that section by taking the Biwako Bridge across, and they’re not wrong to.
How long does it actually take?
If you’re a strong rider with a road bike, you can finish the full 200km in a single day. Plenty do. The Japanese forums are full of full biwaichi day-one logs. But the route was designed for tourers, not racers. The blue line takes detours past castle museums, lakeshore parks, and roadside stations that the time-trial line skips.
The official biwako1.jp pacing of 12 km/h with breaks is the right one to plan against. It builds in the lunch stops, the photo stops at Shirahige Shrine, the inevitable wrong turn at Kinomoto, the slow climb up Tsukide Pass on a hot day. Plan two days for the full loop and you’ll arrive at your hotel by 17:00 instead of 21:00. The light here goes early from October through April; the local advice is to be off the bike by sundown, and after one descent in fading light I understand why.
Which way to ride: counterclockwise, always

The blue arrows only point one direction: counterclockwise. So does the local cycling logic. Japan drives on the left, which means the closer-to-the-lake lane runs in the counterclockwise direction. You get the better view, fewer cross-traffic intersections to negotiate, and signage that actually helps you when you’re tired.
Ride it clockwise and you’ll spend the day looking for arrows that point the wrong way and squinting at faded paint that was meant to be read by oncoming traffic. A GPS computer with the GPX loaded fixes the navigation problem, but it doesn’t fix the fact that you’ll be the salmon swimming upstream against every other Biwaichi rider you meet. There’s no upside.
Pick a starting town (Otsu, Maibara, or Hikone are the obvious three) and follow the line.
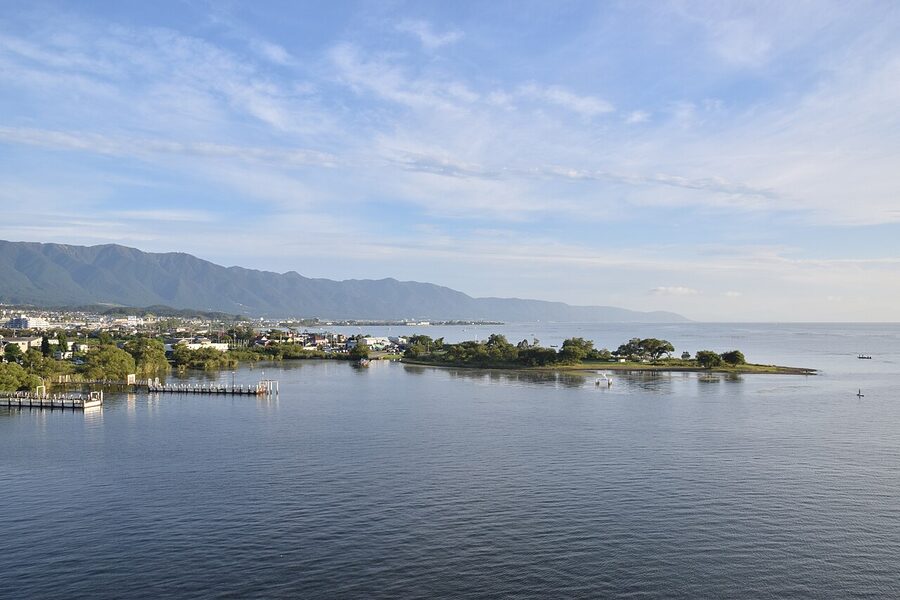
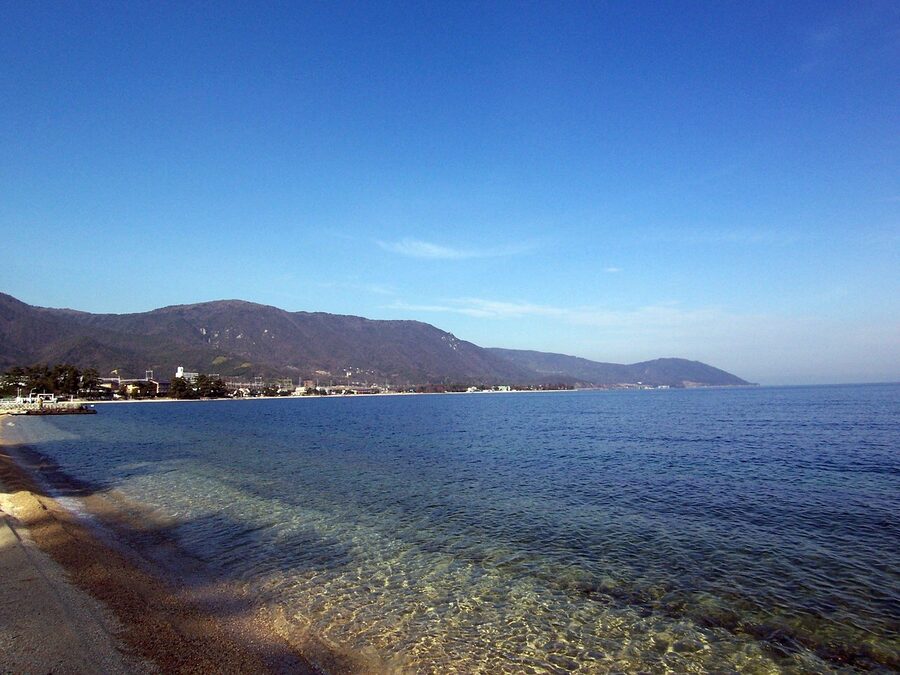
The east shore: flat, fast, and the best part
From Otsu Port north to Kinomoto, the east shore is the easiest cycling in Japan. A separated bike-and-pedestrian path runs along the lakeshore for most of it. There are no traffic lights to wait at on the slow course. There are no climbs worth mentioning. There are vending machines roughly every 3 to 5 kilometres, and roadside stations every 15 to 20.
This is the side that wins everyone over. If you only have one day and you’ve done the planning right, you take a train to Maibara, rent at the station’s cycle counter, ride south as far as Hikone or Omihachiman, and train back. That’s a 30 to 50km out-and-back on the most enjoyable stretch of the loop, and a strong introduction to what the rest of the route will feel like.
Maibara, Hikone, and the bike rental that everyone uses
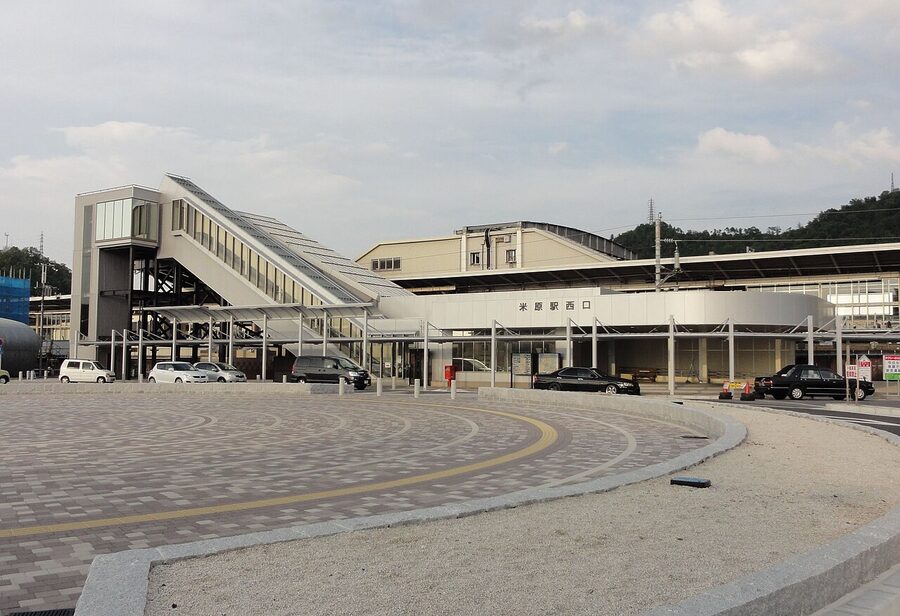
Maibara is the obvious bike rental hub for the Hokko loop. The Maibara Cycle Station counter takes online reservations through a free account on their site, and they hold cross-bikes, road bikes, and e-bikes. The 09:00 slot is the first to go. If you want to start early, book at least three days ahead.
One feature worth using: you can drop the bike at a different station for an extra fee. Riders who only want the prettier northern half routinely pick up at Maibara, ride to Makino, and return the bike at the Grand Park Hotel Okubiwako Makino. That cuts a 200km circuit down to a 55km one-way ride and lets you train back to Kyoto from the north.
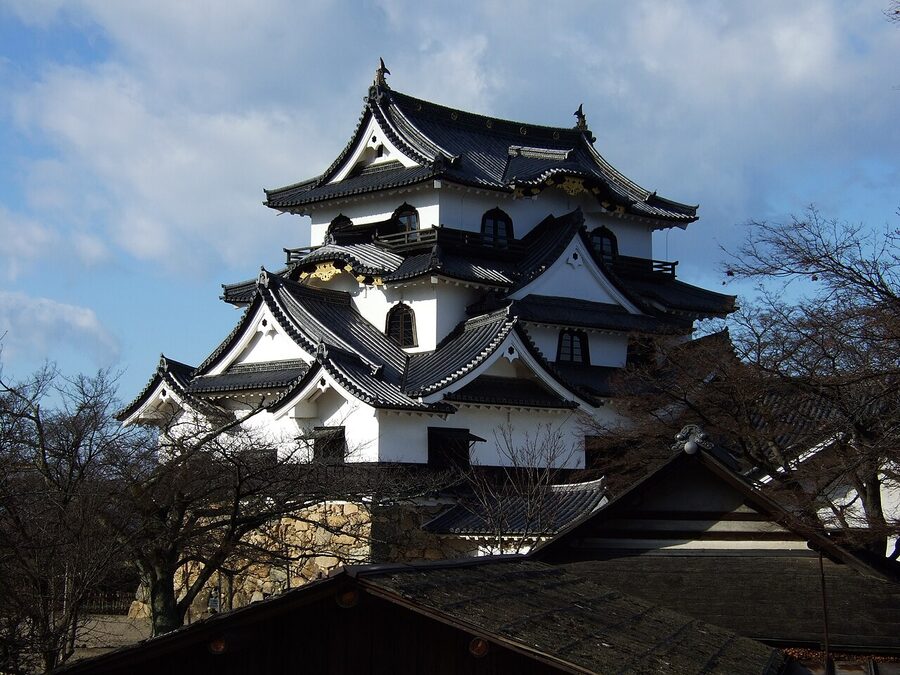
If you’re staying overnight on the east side, Hikone is the better choice over Maibara. The town has a four-hundred-year-old castle, a walkable old quarter called Yume Kyobashi Castle Road, and proper restaurants that stay open past 21:00. Honmachi Juku is a converted machiya guesthouse with private rooms and shared baths, and it’s a 25-minute walk from Hikone Station. That’s where I’d send a friend doing this on a budget.
For dinner, Sennari Tei Kyara does sukiyaki with Omi wagyu, one of the three top-tier Japanese beef brands and the one that nobody outside Japan has heard of. Set menus from around ¥6,500. Reserve.
Nagahama and the Kohoku stretch
Nagahama is the natural lunch stop on day one if you started at Otsu, or the breakfast stop on day two if you stayed at Hikone. It’s a small city with a tourist budget that punches above its weight. The reconstructed Nagahama Castle isn’t worth paying to enter unless you’re a history reader, but the lakeside park around it is. The town’s Kurokabe Square is the kind of preserved-shopping-street tourism Japan does well, and the famous Hokoku Park next to the castle is genuinely beautiful in November when the maples turn.
From Nagahama north, the road quietens. About 11km on, you hit the Kohoku Mizutori Roadside Station, one of the better lake-facing rest stops on the route. The cafeteria does champon noodles, soba, and rice bowls in the ¥800–1,200 range, and the upstairs deck has a clean view across the water to the Hira Mountains. Their souvenir floor sells bottled local soy sauce and dried funa-zushi (the traditional fermented carp), which is mostly something you buy as a gift you don’t have to eat yourself.
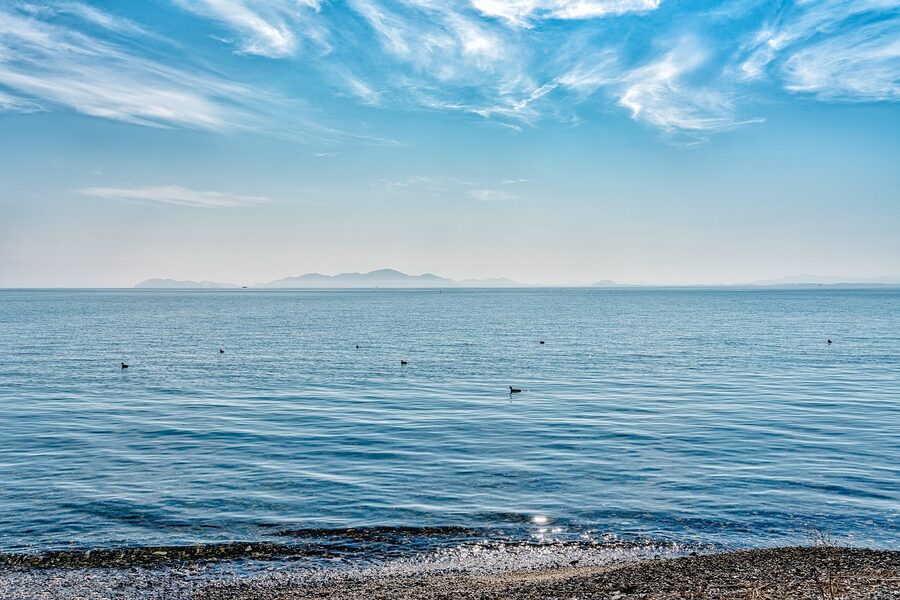
This is also the bird-watching belt. You’ll see fishermen with lenses bigger than my pannier bag standing in the wetlands. Slow down past Hayazaki and Yogo Lake whether or not you care about herons. The traffic stays light all the way to Kinomoto.
The two passes: Mt Shizugatake and Tsukide
The east shore stays flat until Kinomoto, where the route swings inland to cross two short mountain passes. Both are short. Both are surprisingly steep.
Mt Shizugatake is the first. The grade hits 7% for about 900 metres of climb. On a road bike with a 34/30, you’ll be in the spinning gear and grateful. There’s a single bench at a small rest stop near the top, with the lake peeking out between the trees, and a tunnel just before the summit.
Tsukide Pass is the second, and steeper. About 8% for 900 metres. After the top there’s a fast descent into a narrow valley with a chain of short tunnels. I saw wild monkeys on the way down. They ran the other way. Watch for them anyway.

The whole climbing section between Kinomoto and Makino is maybe 20km of riding. After that you’re back on the lake on the west side, mostly flat, all the way to Otsu. If you’re a recreational cyclist and you’ve done any rolling-hills route in your life, you’ll be fine. If you’ve never climbed anything, you’ll know about it the next morning.
One alternative: the Okubiwako Parkway. It’s a one-way (west to east) scenic road that adds about 20km but skips one of the tunnels and runs along the highest point of the northern lake. Drivers love it. Cyclists either love it for the same reasons or hate it because it’s a 3% drag for an hour. I’d take the parkway in good weather and the standard route in rain.
Makino and the Metasequoia Avenue
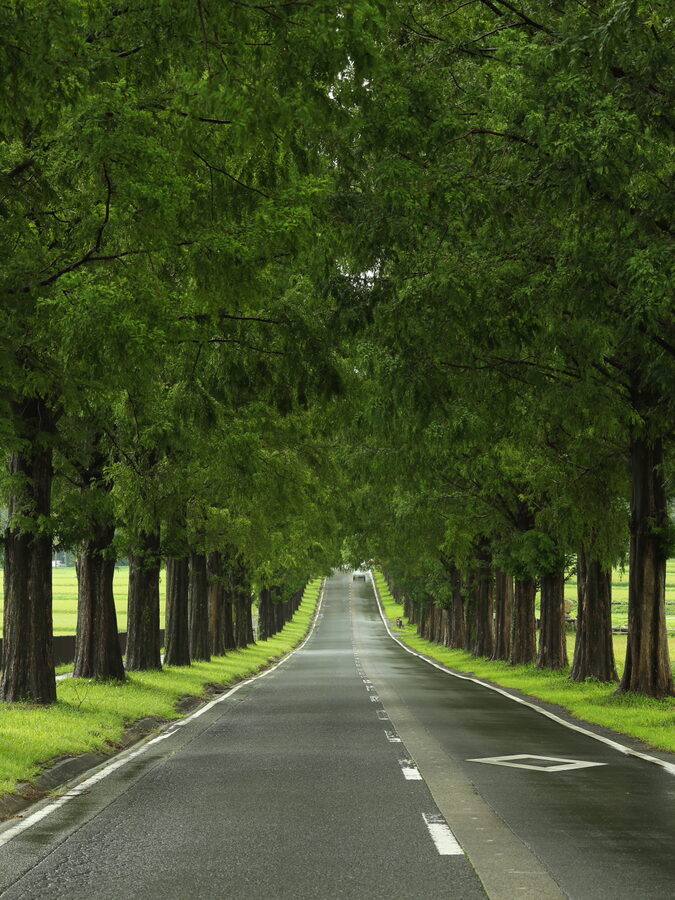
Makino sits on the northwest corner of the lake. It’s small. Population maybe 8,000, including the wider Takashima city limit. There are two reasons cyclists stop here: it’s a logical overnight on the two-day loop, and it has the Metasequoia Avenue.
The avenue is 2.4 kilometres of dawn redwoods planted in single file. In November they turn copper. In April they’re vivid spring green. In January they look like skeletons. It is a spot that locals lined up for in 1981 when it was planted as a windbreak around the Makino Pickland farm, and that international Instagram discovered around 2018. Show up before 09:00 and you’ll have it. Show up at 11:00 on a Saturday in November and there will be coaches.
Accommodation in Makino is thin. The Grand Park Hotel Okubiwako Makino is the standard option. It’s a large lake-facing hotel with rooms that come dinner-and-breakfast included. The food won’t change your life, but the showers are hot, the beds are good, and you’ll sleep deeply after 80km of riding. There’s no onsen on site or in walking distance, which is a small disappointment in a country where the post-ride bath is half the appeal.
The other option is to skip Makino entirely and overnight in central Takashima, near Omi-Takashima or Adogawa stations. You’ll find more restaurant choice, including a much-loved hole-in-the-wall Indian restaurant called RAJU that I’d happily eat at every night for a week. The trade-off is you need to ride 6 to 8km extra in the morning to rejoin the route.
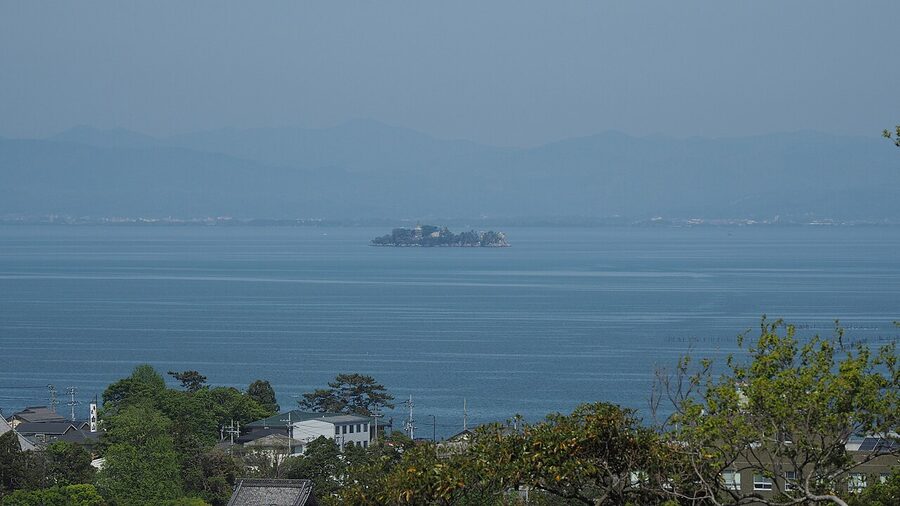
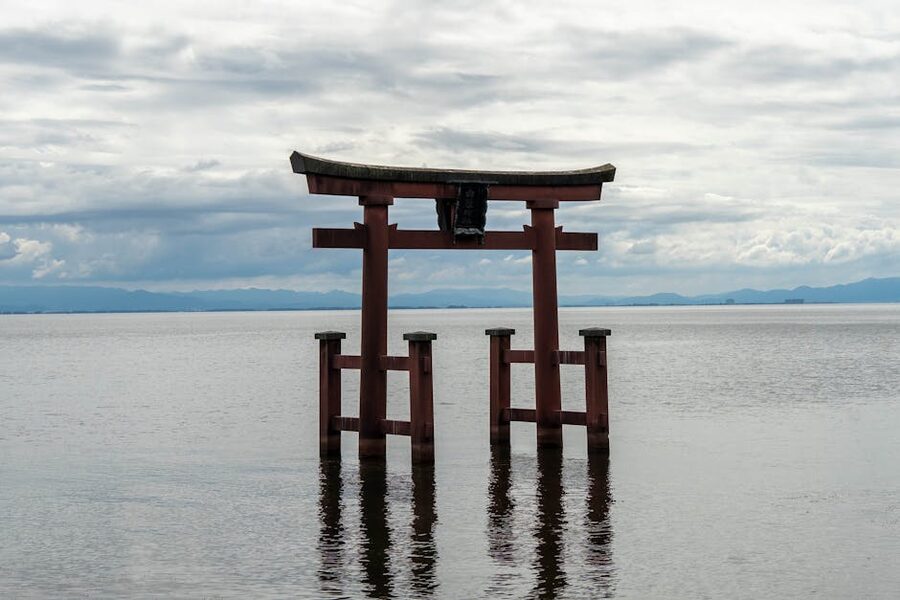
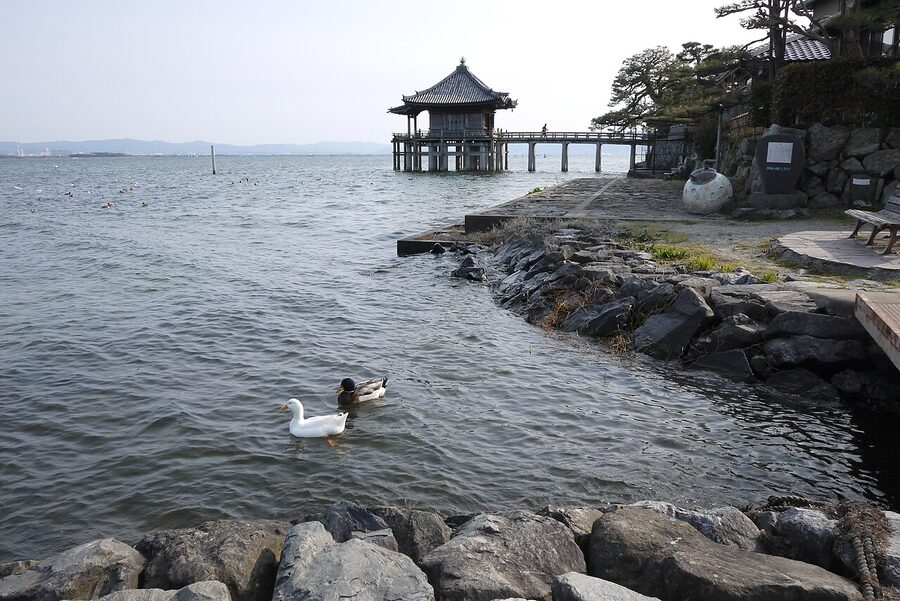
The west shore: Shirahige Shrine and the busy bit
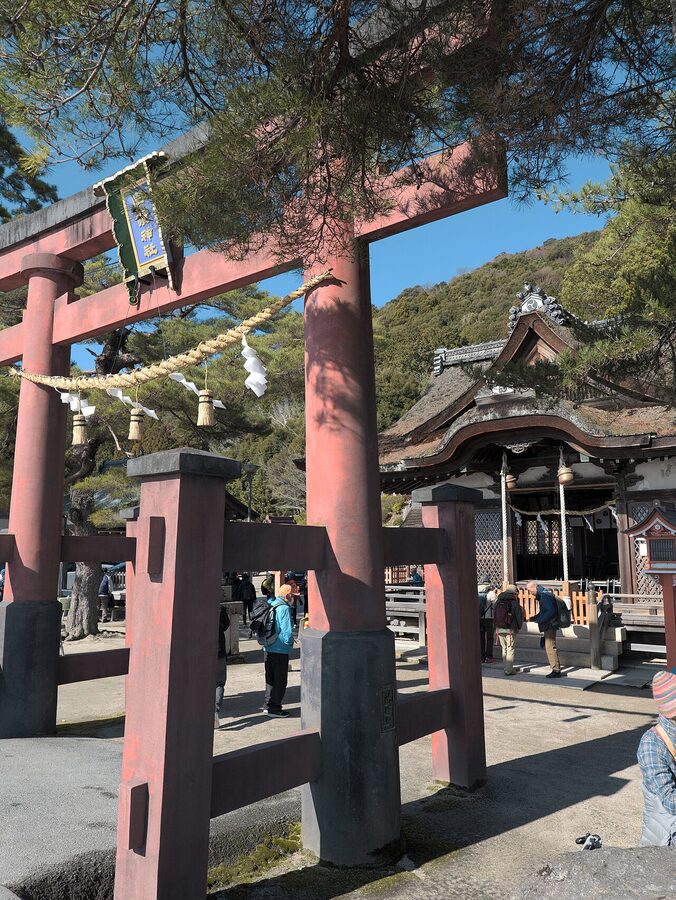
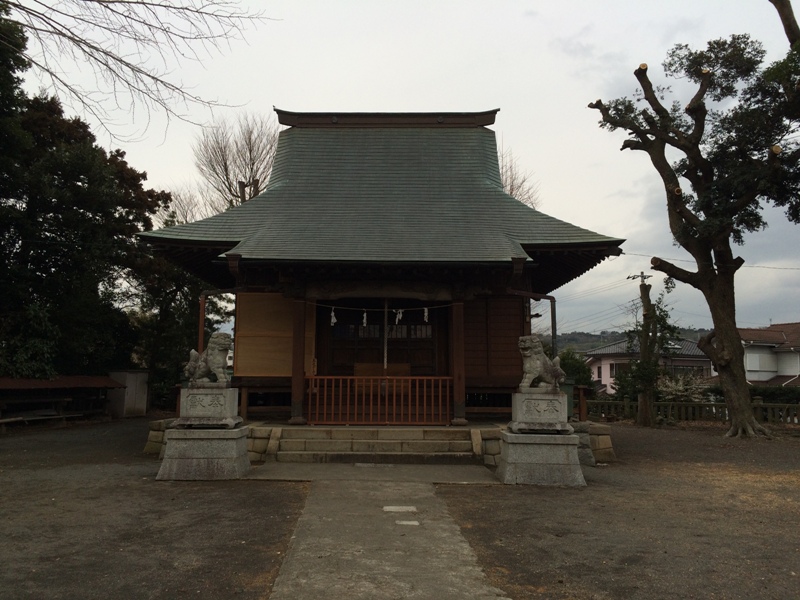
Shirahige Shrine is the postcard. The torii standing in the water has been there in some form since the Heian era, and it’s the only one of its kind on Lake Biwa. The shrine itself is across the road, 1,800 years old depending on which legend you trust, and dedicated to the kami of longevity and good fortune.
The cycling reality of Shirahige is less postcard. Route 161 runs right past the shrine. It’s a two-lane road, no shoulder, with regular truck traffic. The torii is on the lake side; the shrine is on the mountain side; there’s no pedestrian crossing at the shrine itself. On a holiday weekend, with photographers waiting at the gate and a tour bus disgorging passengers, it’s a stressful ten minutes regardless of how careful you are.
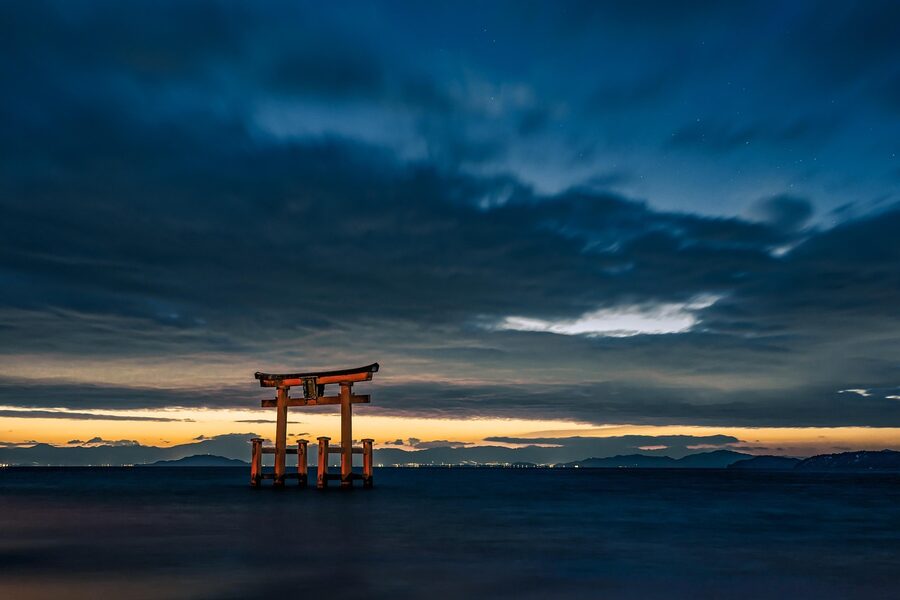
The trick most riders learn: come at dawn. The road’s empty, the light’s better, and you can stand in the middle of the road if you want to. If you’re overnighting at a Takashima city ryokan, ride out for sunrise on day two and you’ll have the place to yourself. If you’re doing it as a single-day pass-through, accept that you’ll see it through traffic and keep moving.
The west shore from Takashima south to Kitakomatsu is the other rough section of the route. Route 161 again, mostly. The cycling lane is painted on the shoulder of the road, the paint is faded in places, and trucks pass close. It’s not dangerous if you ride defensively; it’s just not the kind of cycling you came to Japan for.
Past Kitakomatsu, the route ducks onto back roads through Kitakomatsu and Katata. Traffic drops. The riding gets pleasant again. Most cyclists I asked described this stretch as “the second-best section after the east shore”.
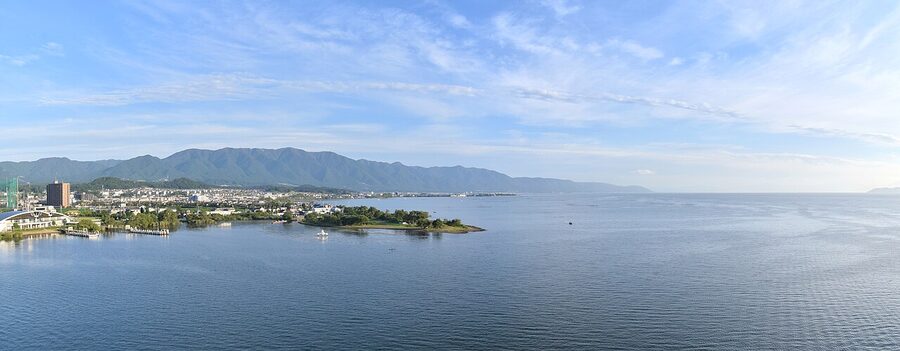
The southern lake: temples on water and the bridge across
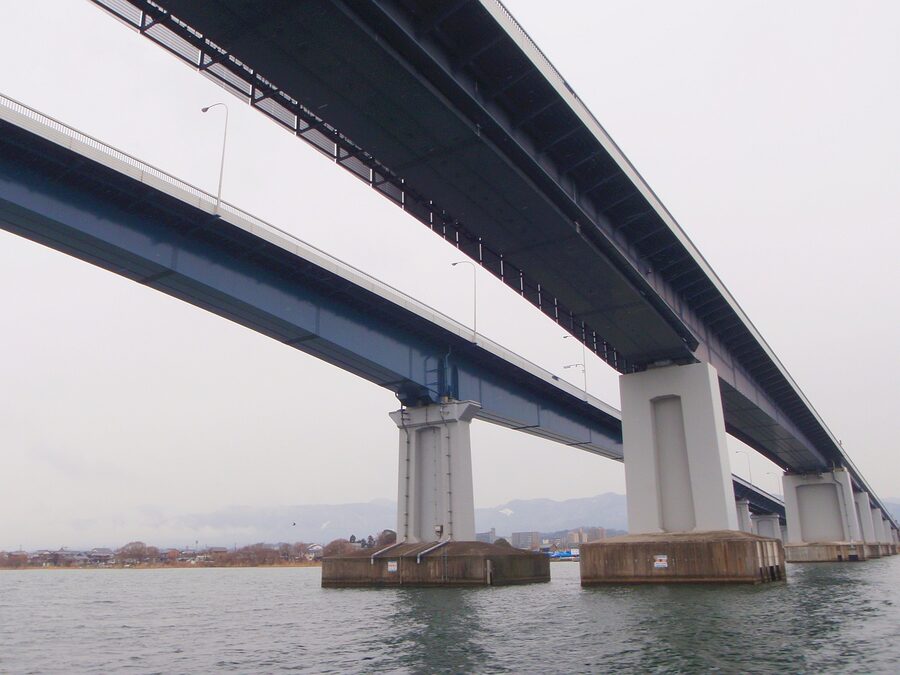
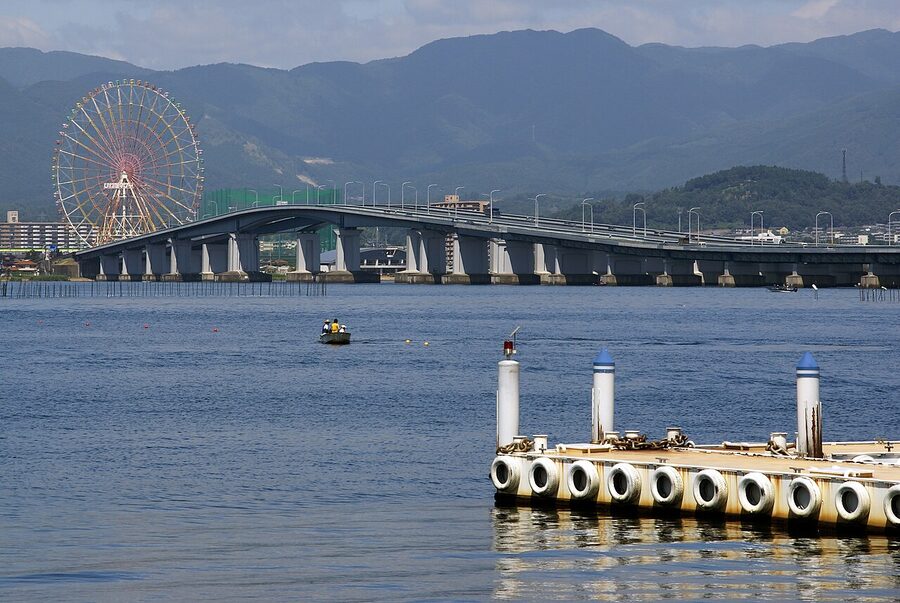
From Katata you have a choice. Continue south along the west shore to Otsu Port and complete the full loop, about 12 more kilometres on the worst road of the route, where there’s still no dedicated bike path and you’re sharing a busy national road with commuter traffic. Or cross the Biwako Bridge eastward, drop down to the east shore, and ride back to your start that way.
The bridge is 1,350 metres across at the lake’s narrowest point, with the bicycle-and-pedestrian path on the side. Cars pay a toll. Bikes and people don’t. The maximum gradient is 4.5%, which sounds like a lot for a bridge but is unproblematic on any geared bike. The view from the apex (the entire south lake spread out south, the broader north lake stretching away) is one of the better twenty-second freebies in Japanese cycling.
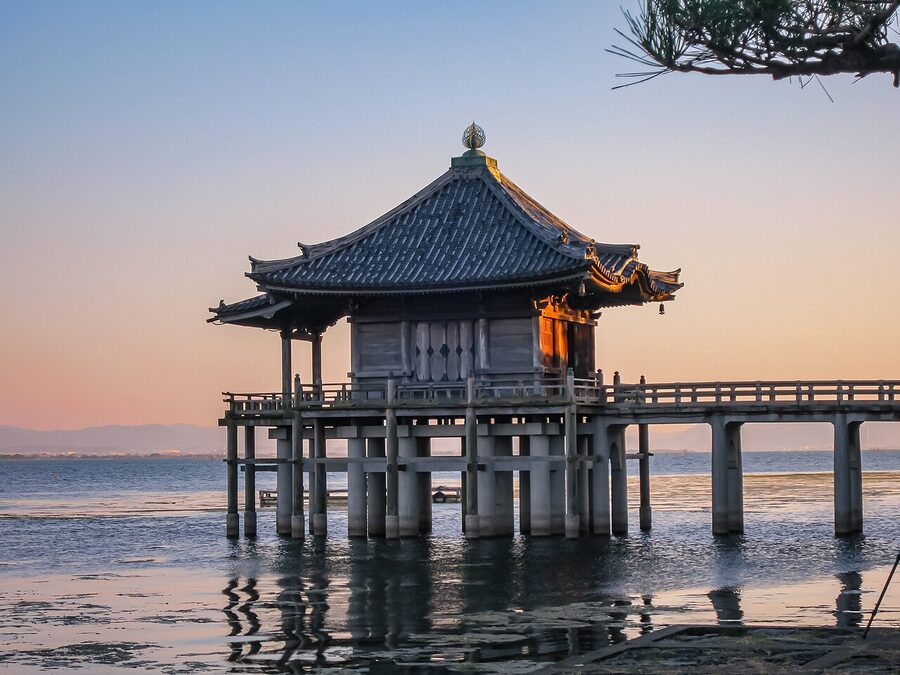
Ukimido: the temple on the water
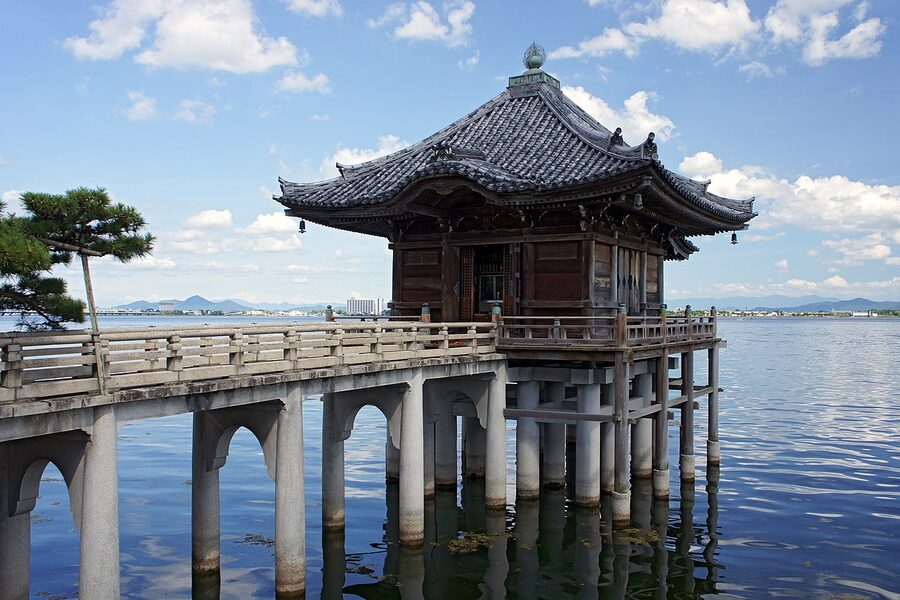
If you came across the Biwako Bridge, the first thing you hit on the southwest shore is Ukimido. The Floating Hall of Mangetsuji temple was built in the early Heian period to pray for the safety of boats crossing the lake. It projects out over the water on stilts. The complete structure has been rebuilt several times since the original; the current version dates to 1937 after a typhoon destroyed its predecessor.
You can’t bring a bike onto the temple grounds, but there’s a small free parking area at the entrance where you can lock up. Admission to the temple is ¥300. The interior is one of the rare images where a place actually looks better in person than in photographs. The Important Cultural Property Kannon statue inside is small but extraordinary, and on a still afternoon the lake water below the floor reflects light up onto the ceiling.
Otsu Port and Seta-no-Karahashi
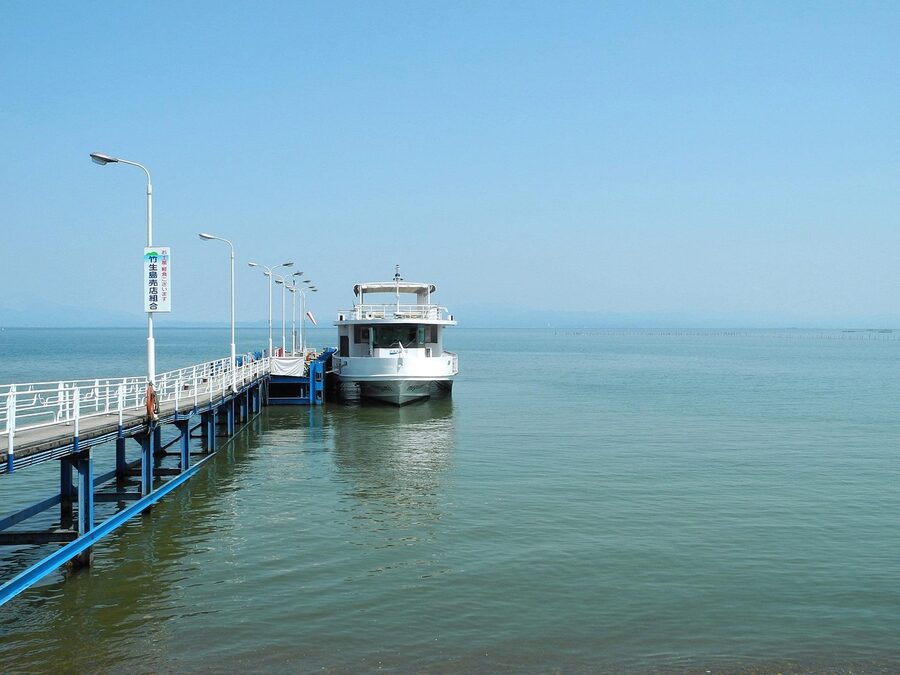
Otsu is the southern hub. It’s a Kyoto bedroom suburb on the surface, a 10-minute train ride from Kyoto Station, but it’s also where most full-loop riders start and finish. The Otsu Port plaza has the big metal “BIWAKO” letters that you’ll have seen on every other Biwaichi finisher’s Instagram. There’s a Biwaichi Bike rental counter on site, with luggage storage at ¥1,000 per day for a suitcase, useful if you came in by Shinkansen and don’t want to drag a bag around the lake.
From Otsu Port the route runs south along the shore to Seta-no-Karahashi, the bridge across the only river that flows out of Lake Biwa. There’s been a bridge here since the seventh century. The current vermillion-painted version is concrete from 1979, but the historical importance is real: this is the bridge that gave Japanese the proverb isogaba maware, “if you’re in a hurry, go around”. The story goes that the safer Karahashi crossing was often faster than the unreliable Yabashi ferry across the lake. The proverb stuck.
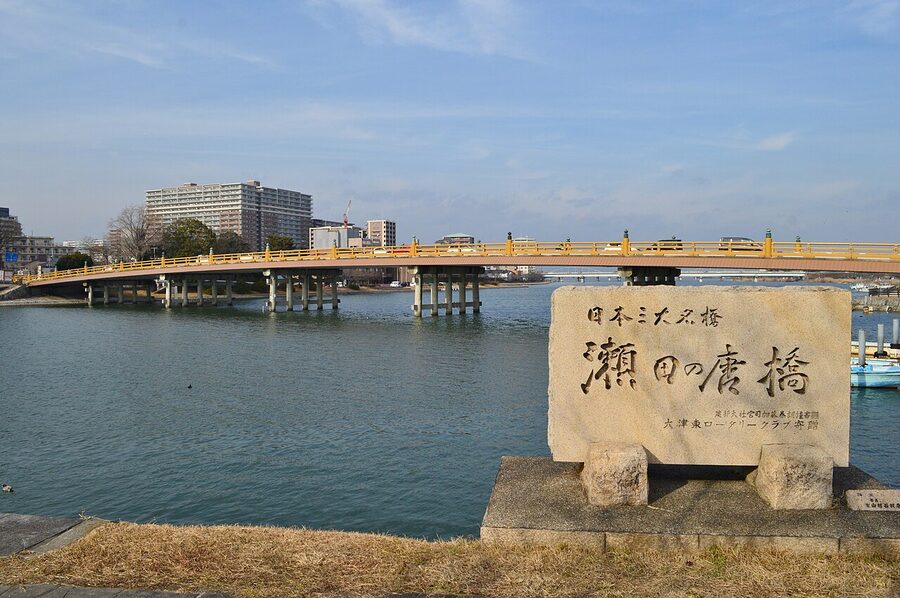
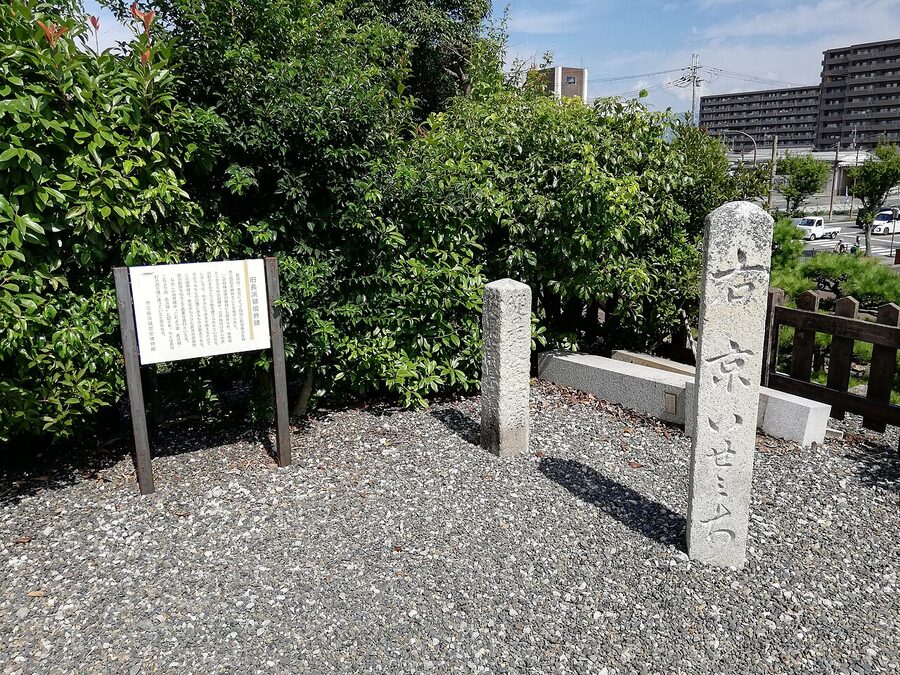
Just east of the bridge is the “Biwaichi Starting Point” (ビワイチ出発の地) marker stone, which is the official ceremonial start of the route even though most people don’t actually start here. If you’re collecting the Shiga Prefecture Biwaichi finisher’s certificate, this is one of the registered checkpoint stones: you scan the QR code with the Biwaichi app, ride to the others, scan again, and a certificate is mailed to you.
Best season: when to ride and when to skip
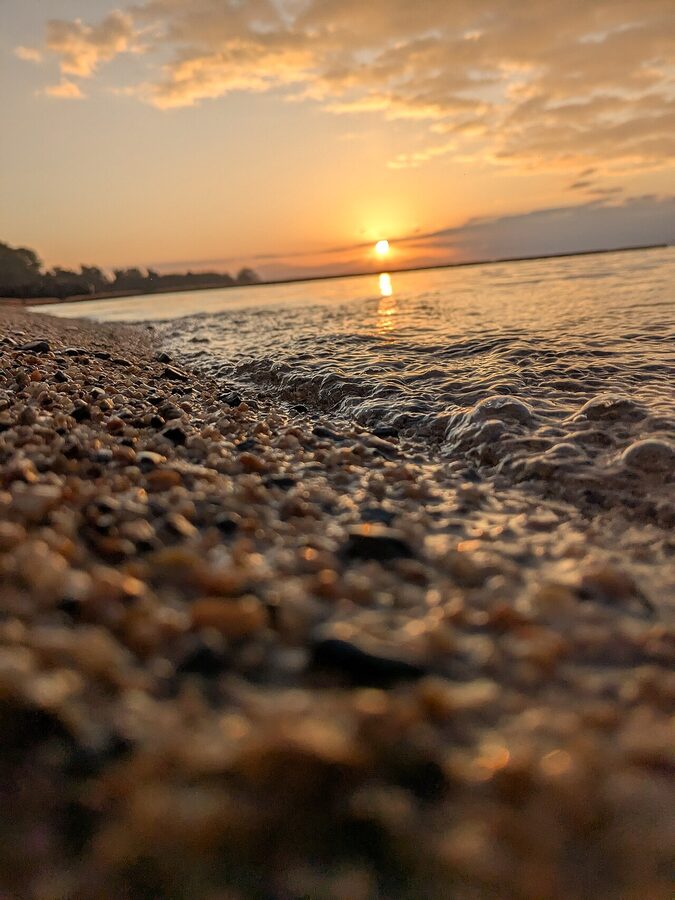
The official tourism guidance, the Japanese cycling forums, and every shop owner I asked agreed on the same answer: May or October. May is best. The temperature is reliably between 15°C and 24°C, the rainy season hasn’t started, and the prevailing wind is gentle. October is the close runner-up. Cooler, drier, with the autumn foliage coming through on the northern slopes from late October.
What to avoid:
- Mid-June to mid-July: rainy season (tsuyu). Multiple straight days of grey light rain. Roads stay wet, descents get sketchy, the views you came for are behind cloud.
- Mid-July to end-August: peak summer. Daytime highs of 33–35°C, humidity over 80%, real heat-stroke risk on the climbs. The locals don’t ride this in summer; neither should you.
- December to March: the northern shore gets serious snow. Kinomoto and Shiotsu can have 30 to 50cm of cover for weeks at a time. The east shore is rideable on clear winter days but the climbs are not.
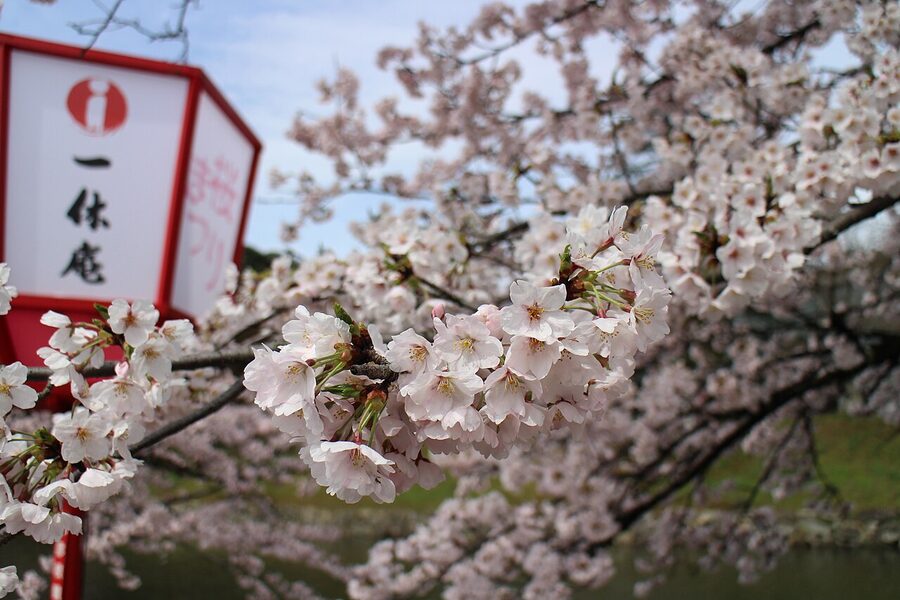
April is fine but the cherry-blossom traffic in Hikone and Nagahama can spoil the eastern stretch. Late October to early November is the best autumn fortnight, both for foliage and for riding temperatures.
Where to stay: the four best Biwaichi base towns
The Shiga prefectural government certifies a list of cyclist-friendly inns under the “Cyclists Welcome” (サイクリストにやさしい宿) programme. These are properties with indoor bike parking, basic tools, somewhere to wash kit, and staff who understand that you’ll arrive late and sweaty. Look for the badge when booking.
The four base towns most full-loop riders actually pick:
Otsu. Best if you’re starting from Kyoto. Train access is excellent (Otsu Station is 10 minutes from Kyoto Station on the JR Tokaido Line), the Biwako Hotel and the Otsu Prince Hotel both have lake views and accept luggage storage. Restaurants stay open late, English signage is reasonable, the Biwaichi Bike rental counter is at Otsu Port. This is the “easy mode” start.
Hikone. Best if you want a more atmospheric base. Honmachi Juku is a converted machiya guesthouse with private rooms and shared baths. The town itself is walkable and full of small restaurants, the castle is worth visiting, and the Hikone Castle Road quarter has a cluster of cafes that open early. Train access from Maibara, 11 minutes away.
Omihachiman. Best if you want history. The merchant quarter with its preserved canals is the most photogenic part of Shiga and the small ryokan on the canal are a different kind of evening. You’re 50 minutes from Kyoto by train. Probably the prettiest small base town on the loop.
Makino / Takashima. Best if you’re doing the Hokko-only loop. The Grand Park Hotel Okubiwako Makino is the dependable lakeside option. Central Takashima has more restaurant variety. Either way you’re 95km from Kyoto by train, so this is a destination overnight, not a base.
Two patterns most riders use:
- Full loop, two days, one overnight: Otsu → Kinomoto (96km, day 1, sleep at a Cyclists-Welcome inn) → Otsu (104km, day 2). Or, with the bridge shortcut: Otsu → Makino (about 90km) → Otsu via Biwako Bridge (60km). The bridge shortcut version is the easier option for first-time tourers.
- Full loop, three days, two overnights: Otsu → Hikone (65km, sleep) → Omi-Takashima (80km, sleep) → Otsu (55km). Most relaxed and the one I’d recommend if you’re new to multi-day touring.
Bike rental and getting your bike to the lake
Three main rental options:
- Maibara Cycle Station at Maibara Station: cross-bikes from around ¥3,500/day, road bikes ¥5,500–7,000, e-bikes ¥5,000. Online reservation through their site (free account required), helmet and puncture kit included. Same-station return only adds zero fee; one-way return to a designated drop point adds about ¥2,200.
- Biwaichi Bike at Otsu Port: wider bike selection, larger luggage storage (¥1,000/day for suitcase-sized bags), cyclists’ lockers and showers on site. Walk-up acceptable but reservations recommended on weekends.
- Hikone Station rental: cheaper city bikes for the day, useful if you’re only riding the easy 16km Hikone–Nagahama out-and-back.
Bringing your own bike from elsewhere in Japan: the standard rinko-bag rules apply. JR will let you bring a bagged bike onto any train at no charge as long as it’s in a soft cover with the front wheel removed. The Tokaido Shinkansen requires a reservation for the bike-bag space (free) on most newer trains. For a single-trip Biwaichi I’d just rent at Maibara. A road bike for the weekend is ¥14,000 against the time, money, and logistics of dragging your own machine.
Food on the route: where to actually eat

You won’t go hungry on Biwaichi. There’s a restaurant or roadside station every 10 to 15 kilometres on the populated stretches, and vending machines almost everywhere else. The pattern most riders follow:
Breakfast on day 1: at the hotel, or B. Lovanga bakery just outside Maibara Station’s west exit if you’re starting from there. Pastries from ¥200, sandwiches from ¥500, and a few outdoor tables.
Lunch on day 1: Kohoku Mizutori Roadside Station is the natural midpoint if you started from Otsu. The cafeteria does ¥800–1,200 mains, and there’s a market downstairs for a backup snack.
Dinner in Hikone: Sennari Tei Kyara for sukiyaki with Omi wagyu (set menus from ¥6,500, reserve). For a cheaper option, the Yume Kyobashi Castle Road quarter has half a dozen izakaya in the ¥3,000–4,000 range.
Dinner in Makino: If you’re at the Grand Park Hotel Okubiwako Makino, eat at the hotel; the alternatives are limited. If you’re in central Takashima instead, try RAJU for Indian or one of the small local soba shops along the main road.
Dinner in Otsu: the Hama-Otsu waterfront has a cluster of lake-facing restaurants that stay open until 22:00. Ohmi Restaurant for local Omi beef bowls; Nakanoshima for kaiseki at ¥5,000–8,000 a head.
Three local foods worth trying along the way: funa-zushi (the original fermented sushi, an acquired taste, sample size first), Omi-gyu wagyu (one of Japan’s three premium beef brands), and Biwa-masu trout (lake-only species, sashimi-grade in spring).
Practical kit and small details
Things I’d pack that aren’t obvious:
- A light windproof gilet. Even in May the lake-effect wind on the Kohoku and Omi-Maiko sections can be cold. The temperature drop between the sunny east shore and the shaded west shore is real.
- A backpack rain cover. The forecast lies. Daily afternoon showers happen even in the “dry” months.
- A small bike bag for the frame. Most rentals don’t include one. You’ll want somewhere for snacks, phone, lock, and tube. ¥1,500 at any decent bike shop.
- The Biwaichi app on your phone. The app shows the official route, bike-friendly accommodation, and most importantly the registered Cycle Rescue puncture-help service points. The route is well-marked but the app is a useful safety net. The Cycle Rescue in particular, which will come and rescue you with a puncture or breakdown for a flat fee.
- Cash. Smaller roadside stations don’t all take cards yet. ¥5,000 in cash covers a comfortable two days of food and drink.
The route itself has free public Wi-Fi at roughly a thousand spots around the lake, mostly at convenience stores, roadside stations, and major shrines. Phone signal is universal except briefly on the climbs near Shiotsu.
One last small detail: the Biwaichi Cyclists’ Sanctuary stone (サイクリストの聖地), unveiled in 2018 at Daini Nagisa park near Moriyama, is one of the official photo stops on the loop and gets you a check-in for the certification. Worth the five-minute detour from the main route.
How Biwaichi compares to Shimanami
The two routes most foreign cyclists weigh up are Biwaichi and the Shimanami Kaido, the 70-kilometre island-hopping route between Hiroshima and Ehime. They’re the two best-known National Cycle Routes and they’re nothing alike.
Shimanami is shorter, simpler, and more dramatic: six bridges, six islands, blue ocean instead of grey lake. It’s the better choice if you only have one cycling day in Japan, or if you’re new to long-distance touring. The bridges are spectacular, the islands are quiet, and the route is so well-organised that you can do it on a heavy rental bike with sandals.
Biwaichi is longer, more varied, and more practically useful. You see castle towns, mountain villages, fishing harbours, postcard shrines, an Indian restaurant in a town of eight thousand people, a 1,300-year-old bridge, and the largest body of fresh water in the country. It’s a country in miniature. The riding is easier than Shimanami in absolute terms (less climbing, more separated path) but harder in attention (the west shore traffic, the busy shrine pass-through). If you have two cycling days and you want one big arc that gives you the most of Japan in the least transit, Biwaichi is the route.
The answer most riders settle on: do Shimanami first if you’ve never cycled in Japan; do Biwaichi if you’re coming back for a second trip. They reward different things. Both reward the trip.
For more practical questions about cycling in Japan (bringing your own bike on a Shinkansen, the rinko-bag rules, navigation apps, what the road etiquette actually demands), see the cycling Japan FAQ.
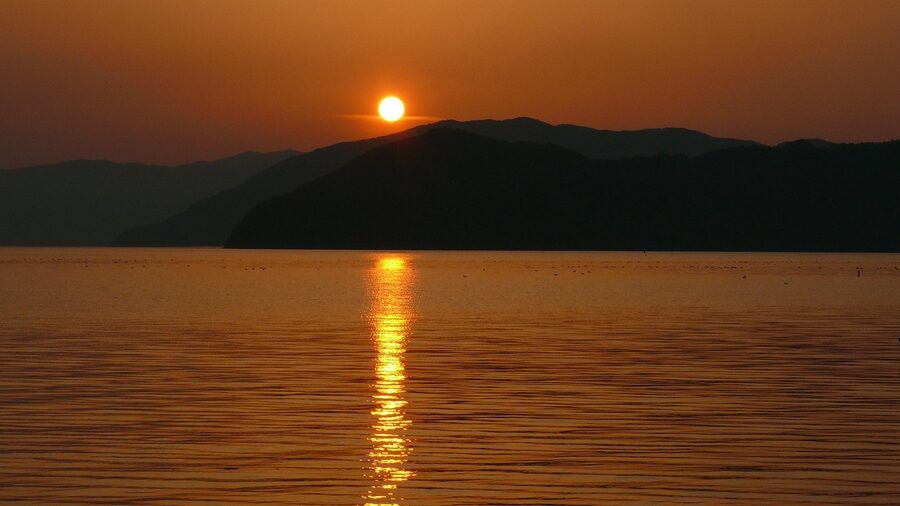
Sit at Otsu Port at sunset on the day you finish, with the BIWAKO letters behind you and the lake gone pink. Two days. Two hundred kilometres. Twelve kilometres an hour. The numbers add up to one of the better weekends in Japanese cycling.
.jpg)
.jpg)
_hdsr_Shrine_S5_26.jpg)